
ORC Kitchen – Week 4 – New Cabinets
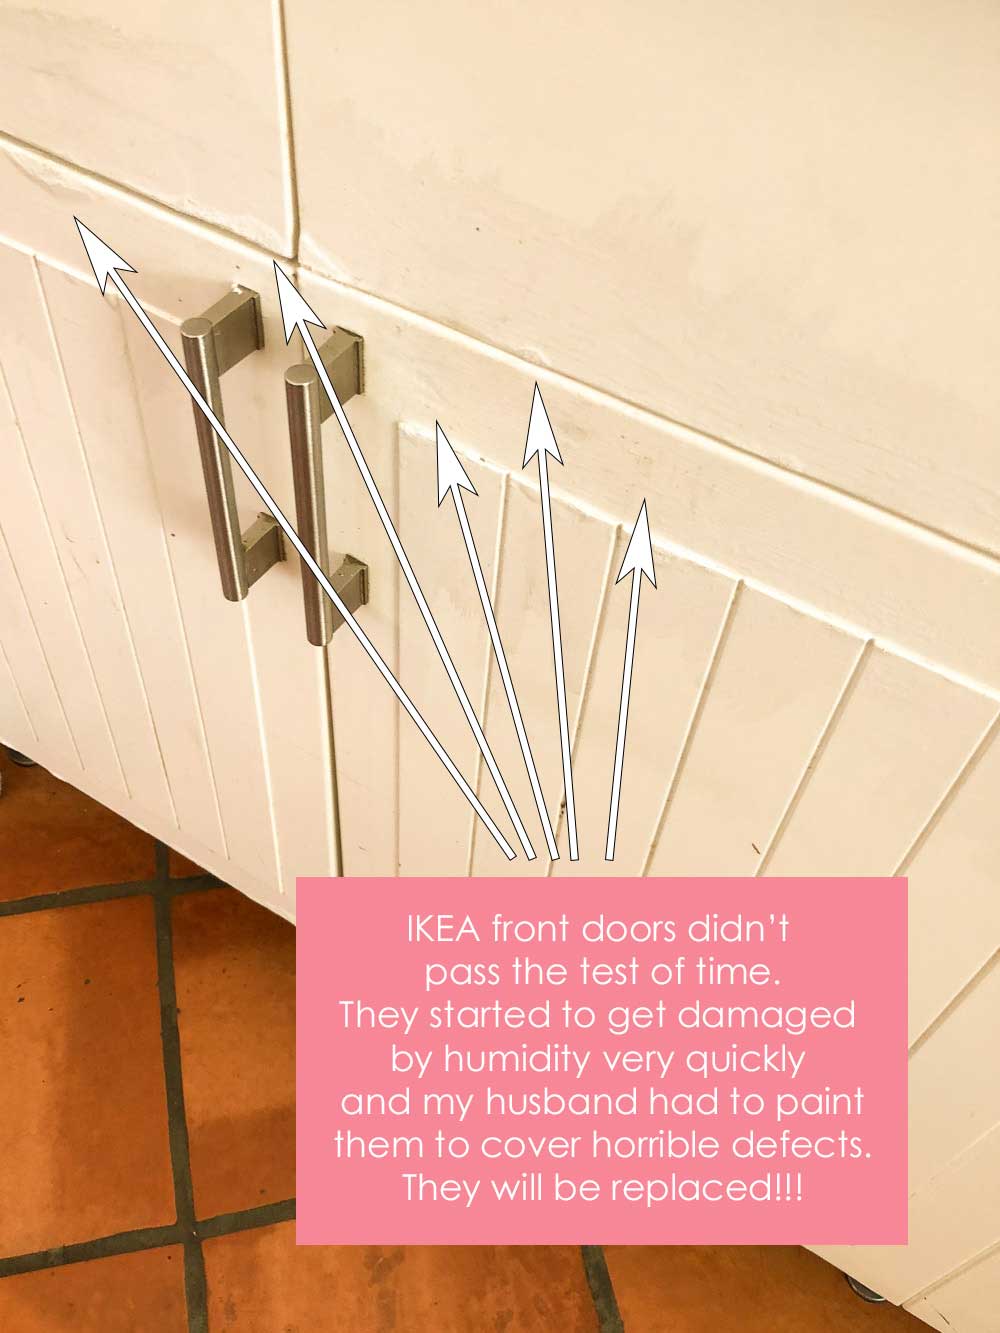
 Some of you have asked me: “How can you be so INSANE as to participate in the One Room Challenge when you are 7 MONTHS PREGNANT!!!” Well, I will tell you. 6 years ago, George and I bought our home and decided to use IKEA kitchen cabinets for our kitchen. As much as I love IKEA and its aesthetics, I don’t like the quality of all its products. Anybody else in agreement out there?
Well, within six months our kitchen cabinet doors were deteriorating, and within a couple of years, they were in a pretty sad state. George painted white all the imperfections as a temporary solution, but the truth still remained: my kitchen cabinets looked like crap, and it was intensely annoying!!!!
Proof:
Well, some months ago I was approached by Cabinet Door Mart. They mentioned they would like to work with me on an upcoming blog project and my kitchen soul got REALLY excited!!!!
Sometimes, opportunities fall on your lap, and you have to take them, no matter that a child is growing in your belly at lighting speed! This was my ONE AND ONLY OPPORTUNITY to get rid of those horrible IKEA cabinet fronts and replace them with good quality doors!!!!!! I took the opportunity, people, and I haven’t looked back yet.
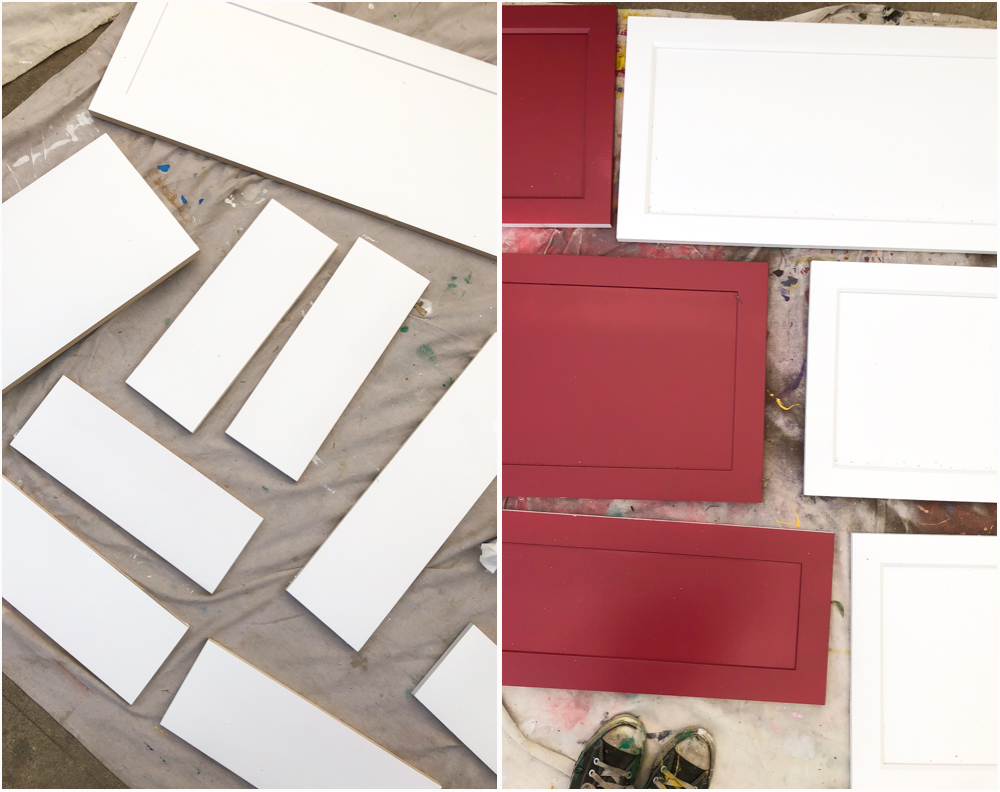
This is the thing: replacing IKEA cabinet doors and drawer fronts is NOT easy. The measurements of the furniture I bought six years ago don’t exist anymore! And there was no way I was going to replace all my cabinets, much less using more IKEA doors and fronts to have them all fall apart because of humidity in less than a year. I just needed a “facelift” not a full-on plastic surgery, so Cabinet Door Mart came to the rescue.
Good news is that this company will customize doors and fronts to whatever size you need. You have to round up your door sizes to the next 1/16 of an inch. I measured all my cabinets, sent a list of what I needed, and got all my new doors and fronts in no time, nothing short of a miracle. Customer service = excellent.
All doors and fronts came in natural wood. We decided to paint them ourselves in the Radicchio color by Farrow & Ball. The only thing is that, as much as I love European anything, I am not about to spend hundreds of dollar in a gallon of paint, so I asked my local paint store to match the color in Benjamin Moore paints. I ordered satin finish. I did not want the typical semi-gloss kitchen finish, what can I say, I am not always a fan of shiny kitchens. The idea behind using glossy paint in a kitchen is that it is easy to wipe, but satin is an excellent finish for that purpose, too, so that is what we used.
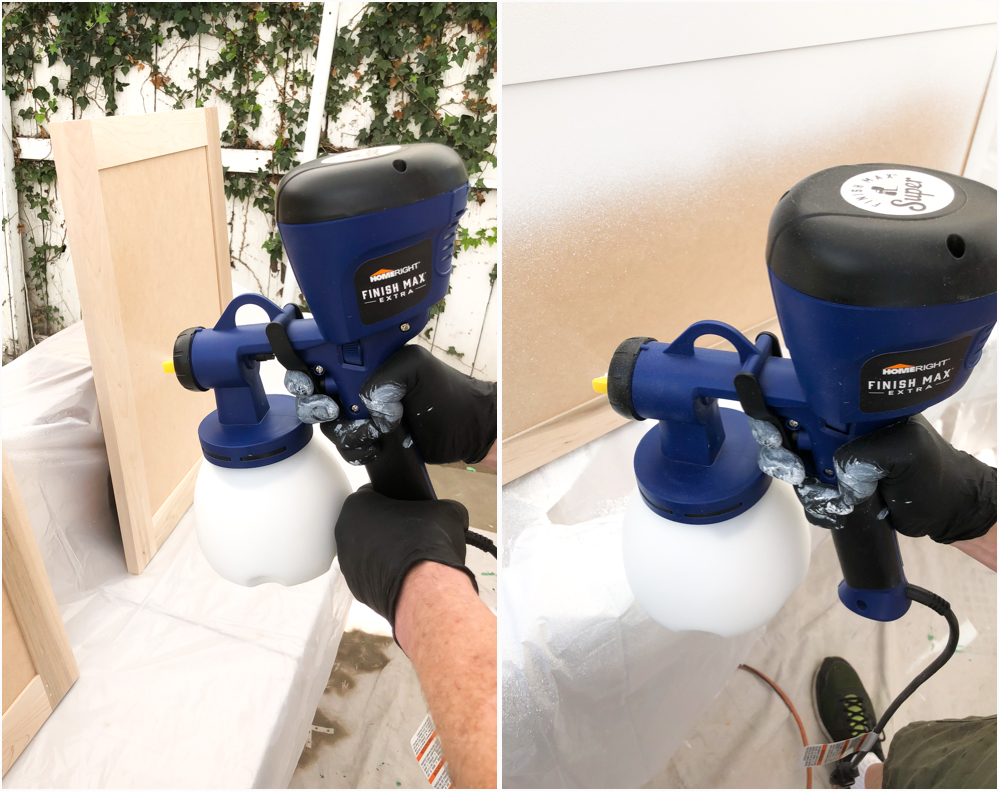
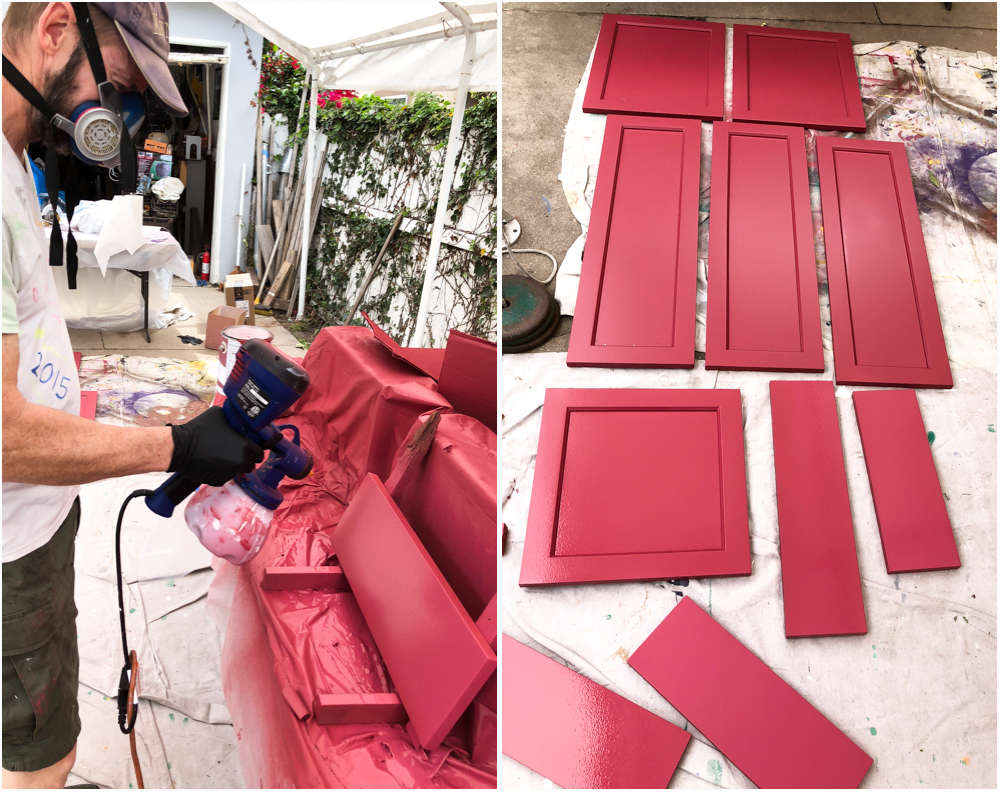
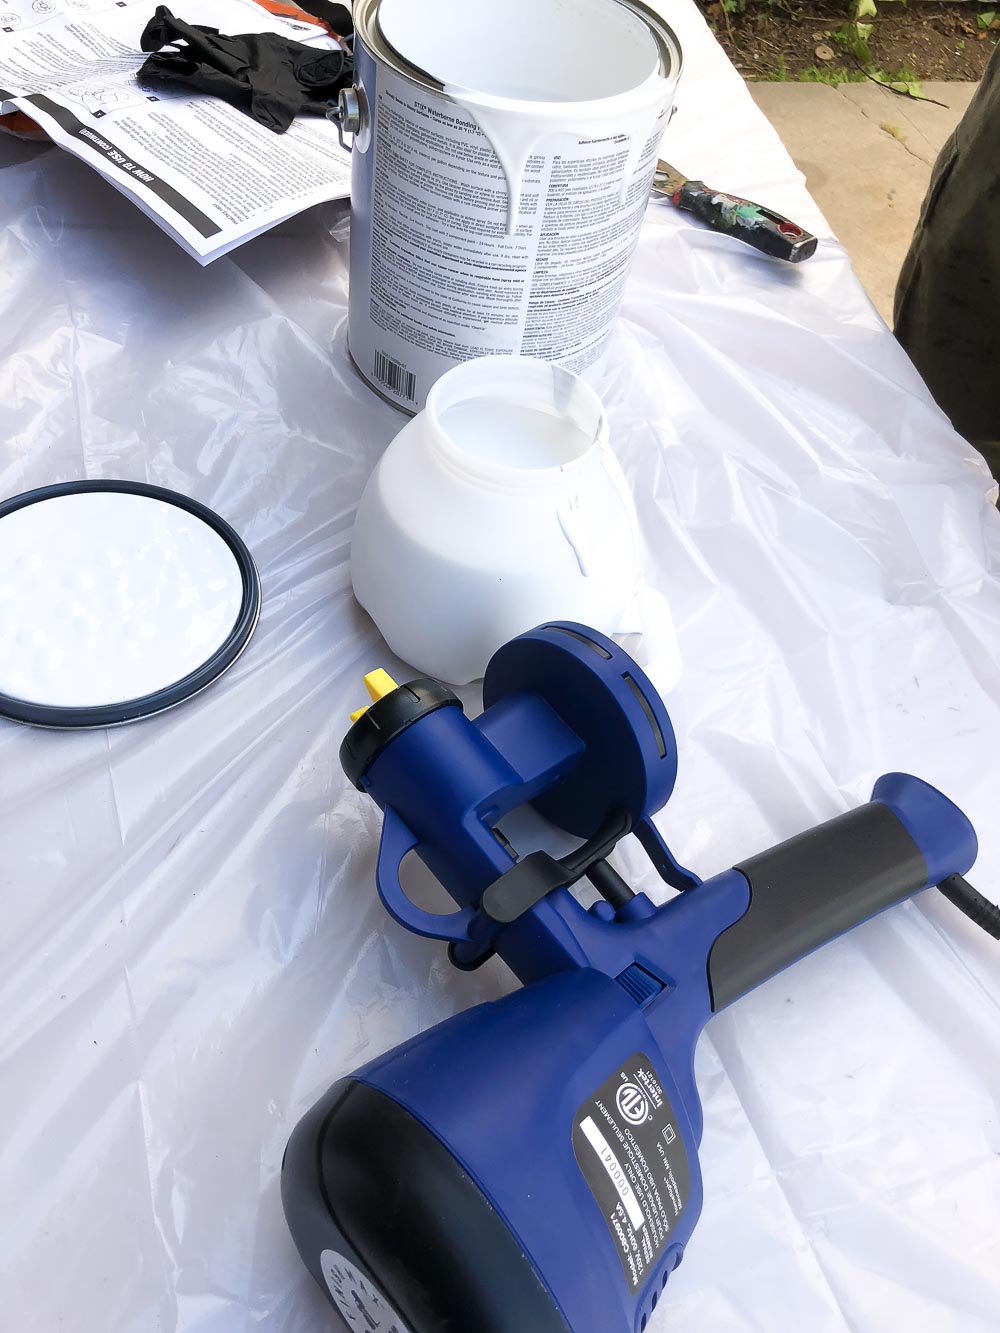 After receiving the doors and fronts, George and I started painting. Luckily, we had an excellent HVLP paint sprayer to help with the task: the Super Finish Max Extra by Home Right. Last year, when I went to the Haven Conference, there was a booth from Home Right showing the versatility of this product. I fell in love with it because even me, an inexperienced spray painter, was able to make a paint job look perfect!!! I begged them to send me a Super Finish Max Extra, I even cried a little, and they were kind enough to say yes!!!!
 Ladies and gentlemen, this tool made the paint job so easy! First, we primed the doors and fronts, then we let the primer dry one hour or two and got to the real paint. We did two coats of the radicchio paint in the front only. The Super Finish Max Extra allows you to choose the thickness of your spray and we went a little bit thick. That and the primer allowed for just one coat of paint on the back of the doors. Take a look:
 Looking good, gorgeous doors!!!!
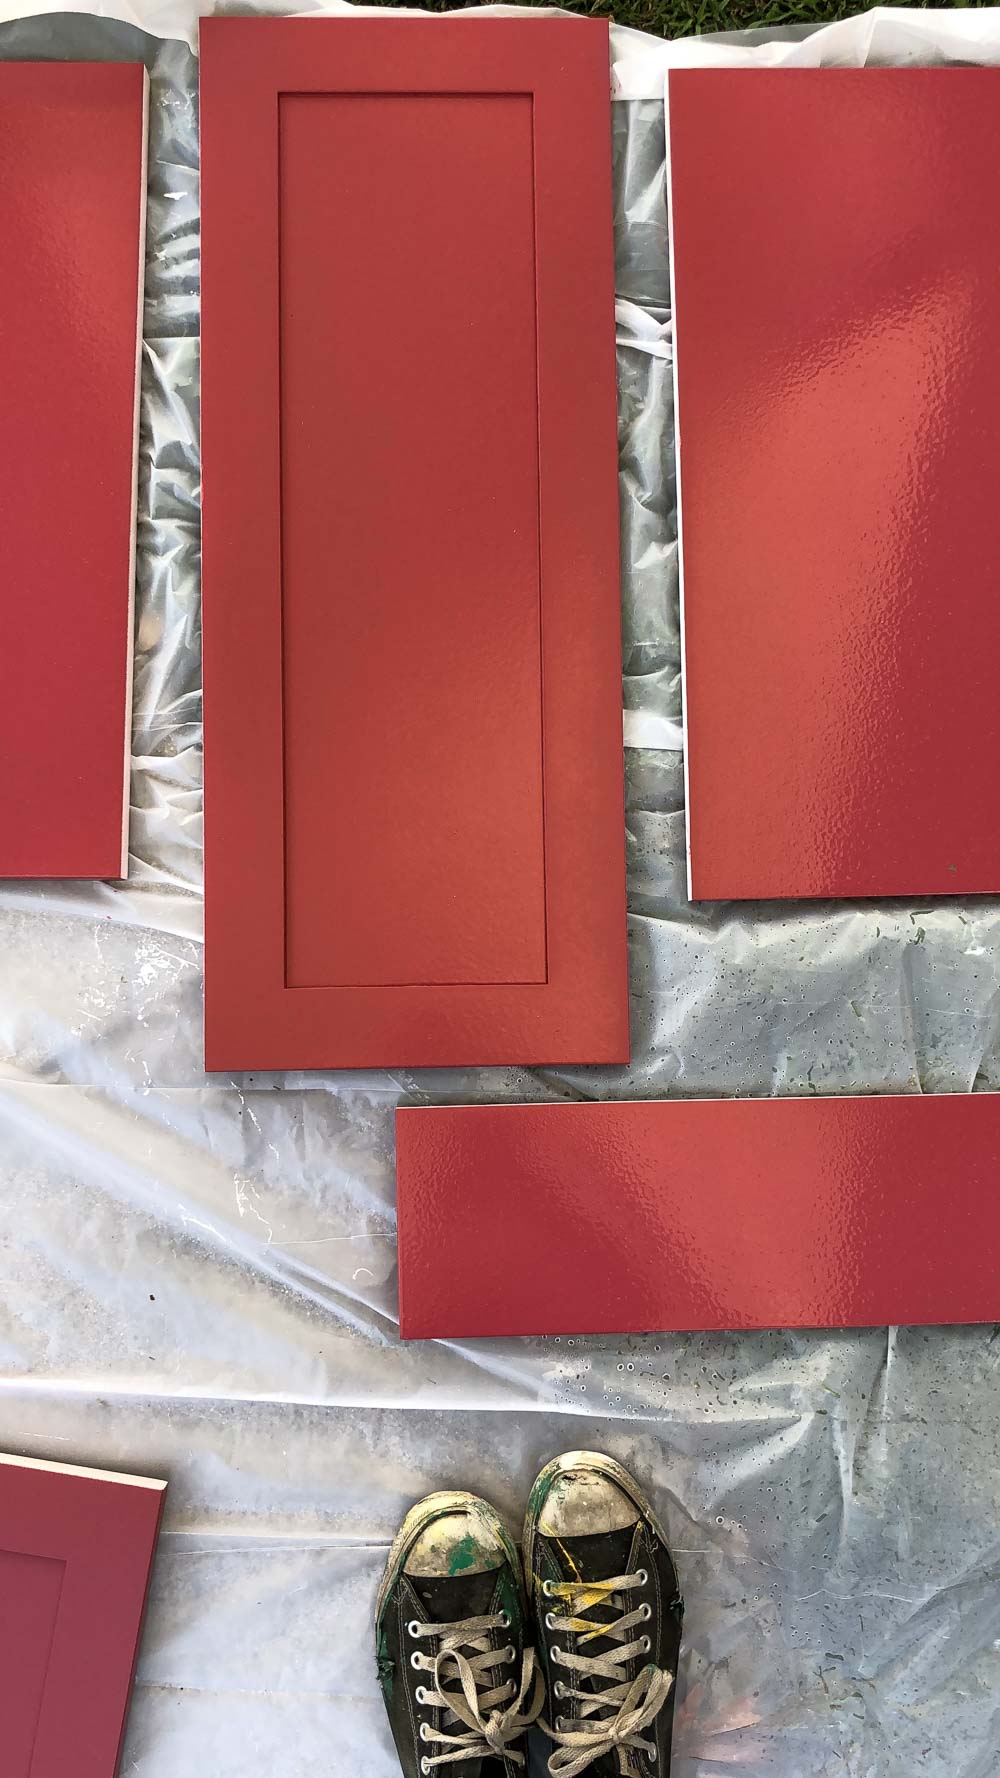
Now, I am not going to lie. Although the Super Finish Max Extra makes your life a lot easier, painting 31 cabinet doors and drawer fronts is not a stroll in the park. It took all weekend to finish this project, mainly because we had to wait for the paint to dry before applying a new coat. Also, you need to be SUPER careful handling all the doors, so you don’t touch the fresh paint and ruin the whole job, but look at the result! I mean, the color is just perfect. I love it all and I am thrilled to have doors and fronts that are of good quality! 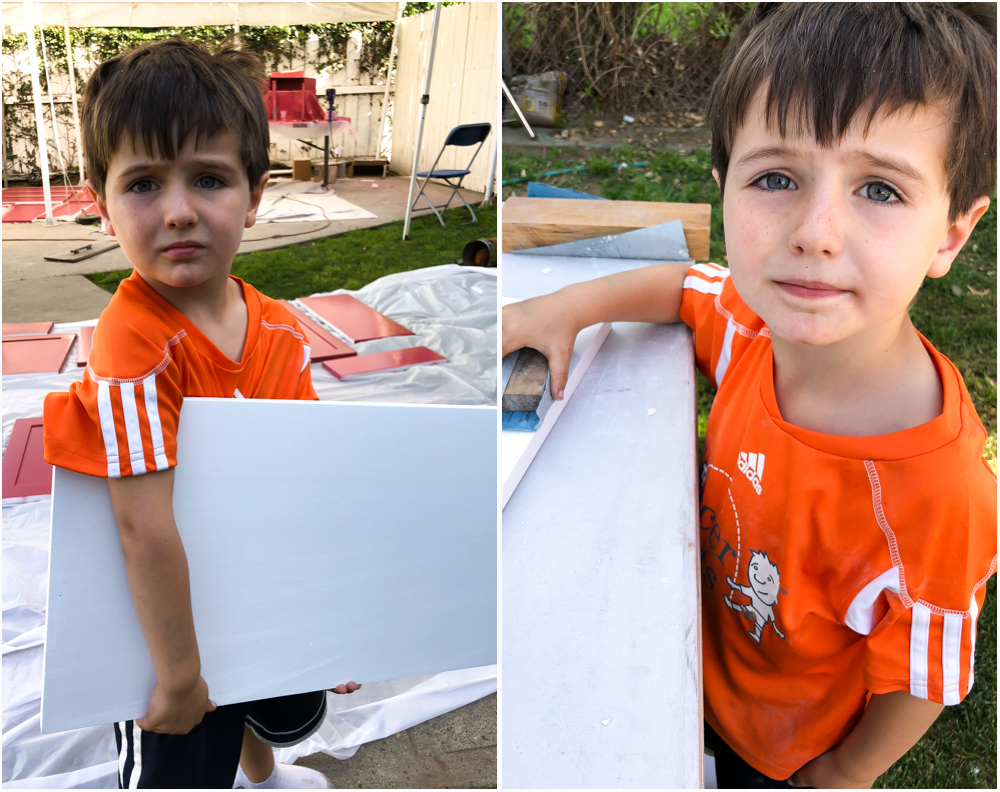 Another
 problem sweet thing that happened was that Max decided to help. We want to be encouraging parents that teach their children to be independent and do projects, but, let me tell you, I would rather not have to deal with a four-year-old while painting 31 cabinets!!! Augh! But then, look at that sweet face… oh well, he helped, and things worked out fine in the end. 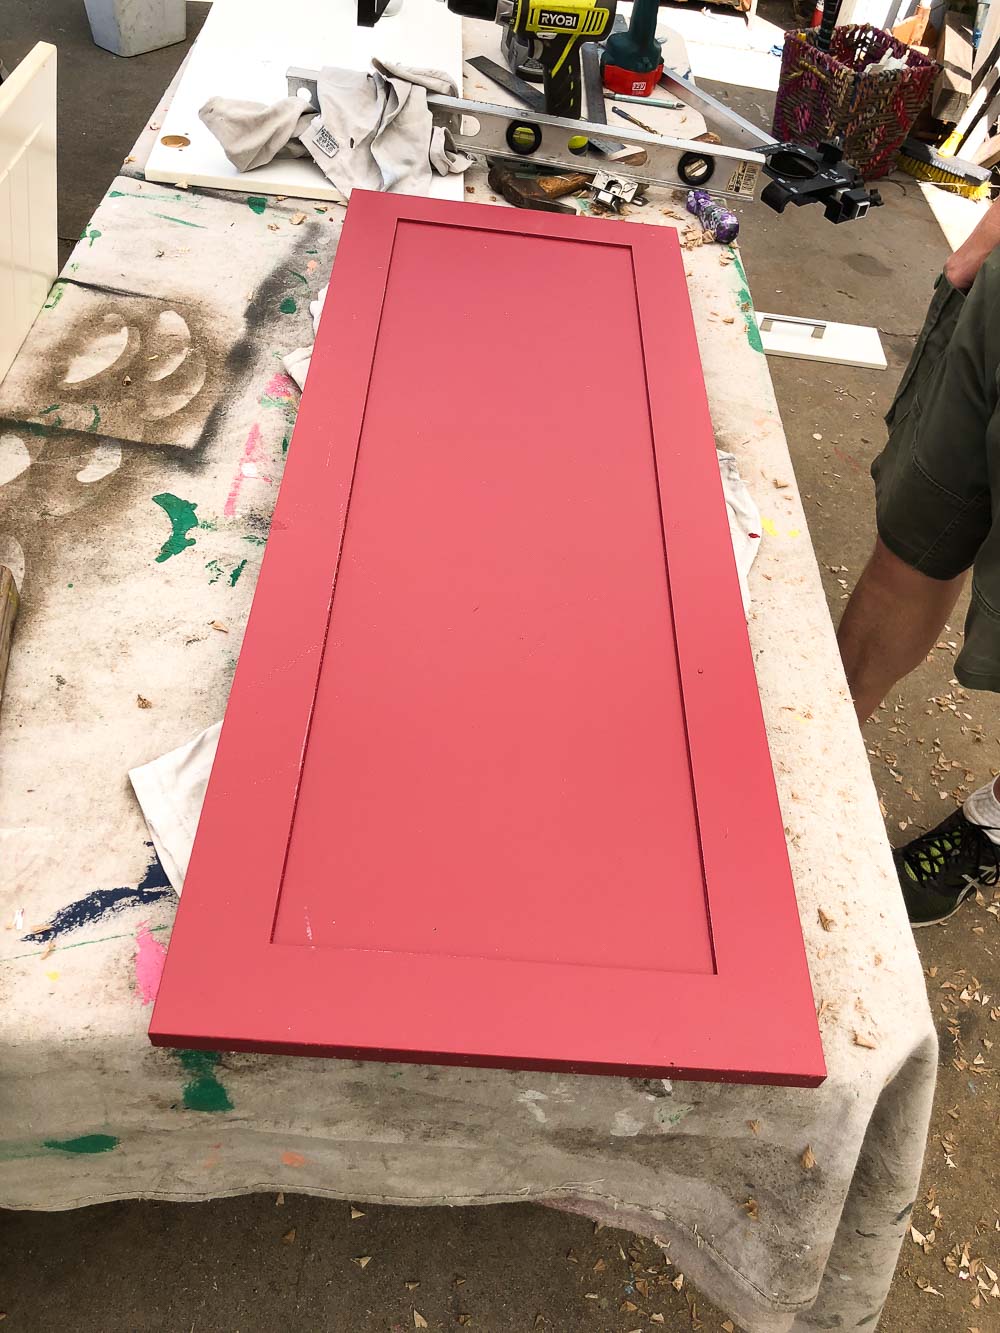 After painting, we had to drill cup hinges for the cabinets. Cabinet Door Mart can send pre-bore doors, but, because we had IKEA cabinets and were not sure of the measurements, we decided to do this ourselves. Again, not an easy project. The truth is that for this, I didn’t do much, it was all George, and he made it work beautifully. I got the Rockler Jig-It Deluxe Concealed Hinge Drilling System to help with the task, but it was a little bit of a disappointment.
 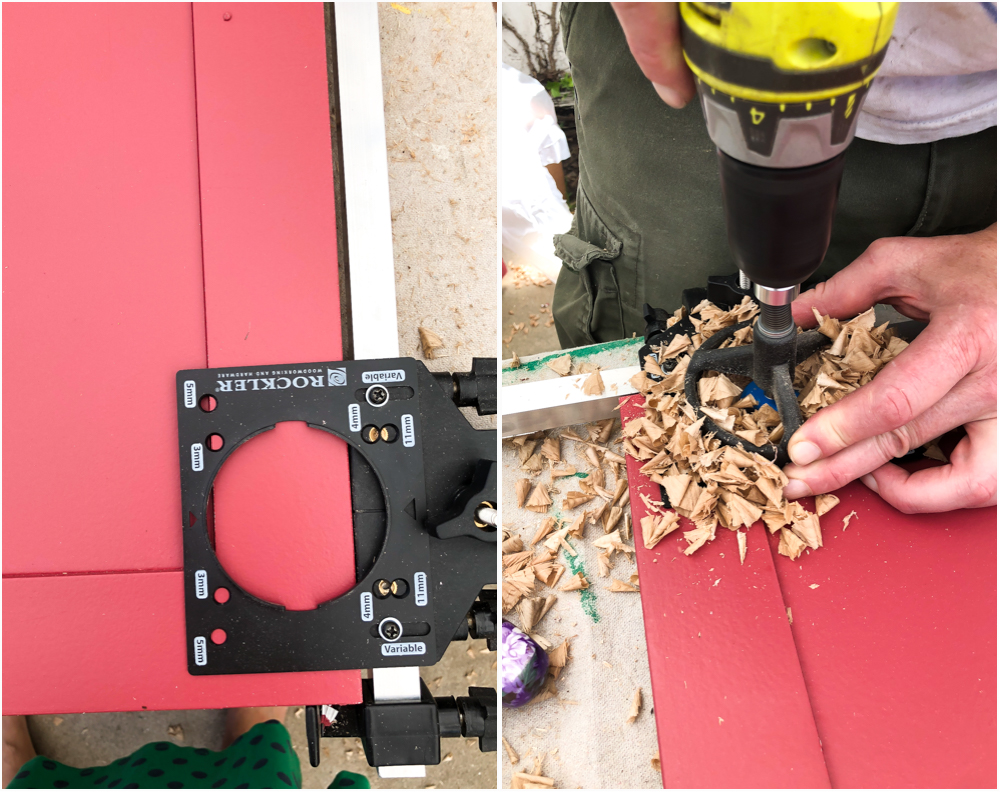 Not only the rail wasn’t long enough for our 39″ cabinets, but the Jig mounting holes were not aligning right. Of course, George was able to fix the issue by using different screws and other tricks, but, if you are not handy or have a good handy person around, I wouldn’t recommend drilling the cup hinges of your cabinets yourself. In any case, if you decide to go this route, find a better system than the Rockler we used.
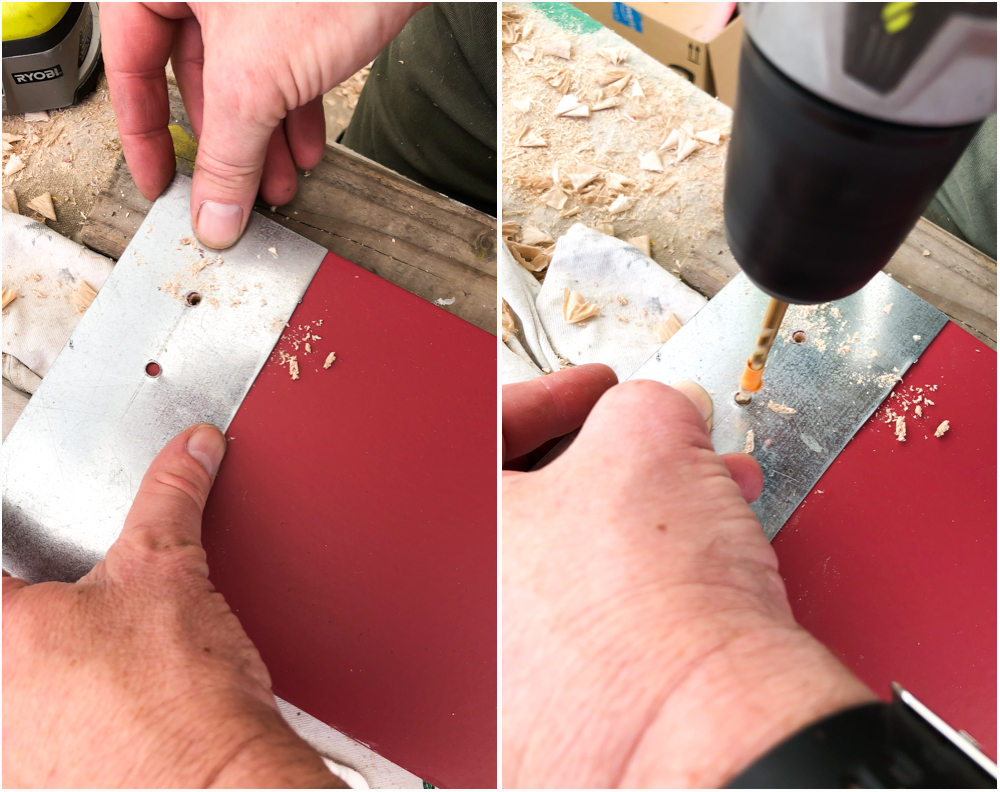 Look at my hubby’s invention to drill holes at a consistent width. He is soooo good.
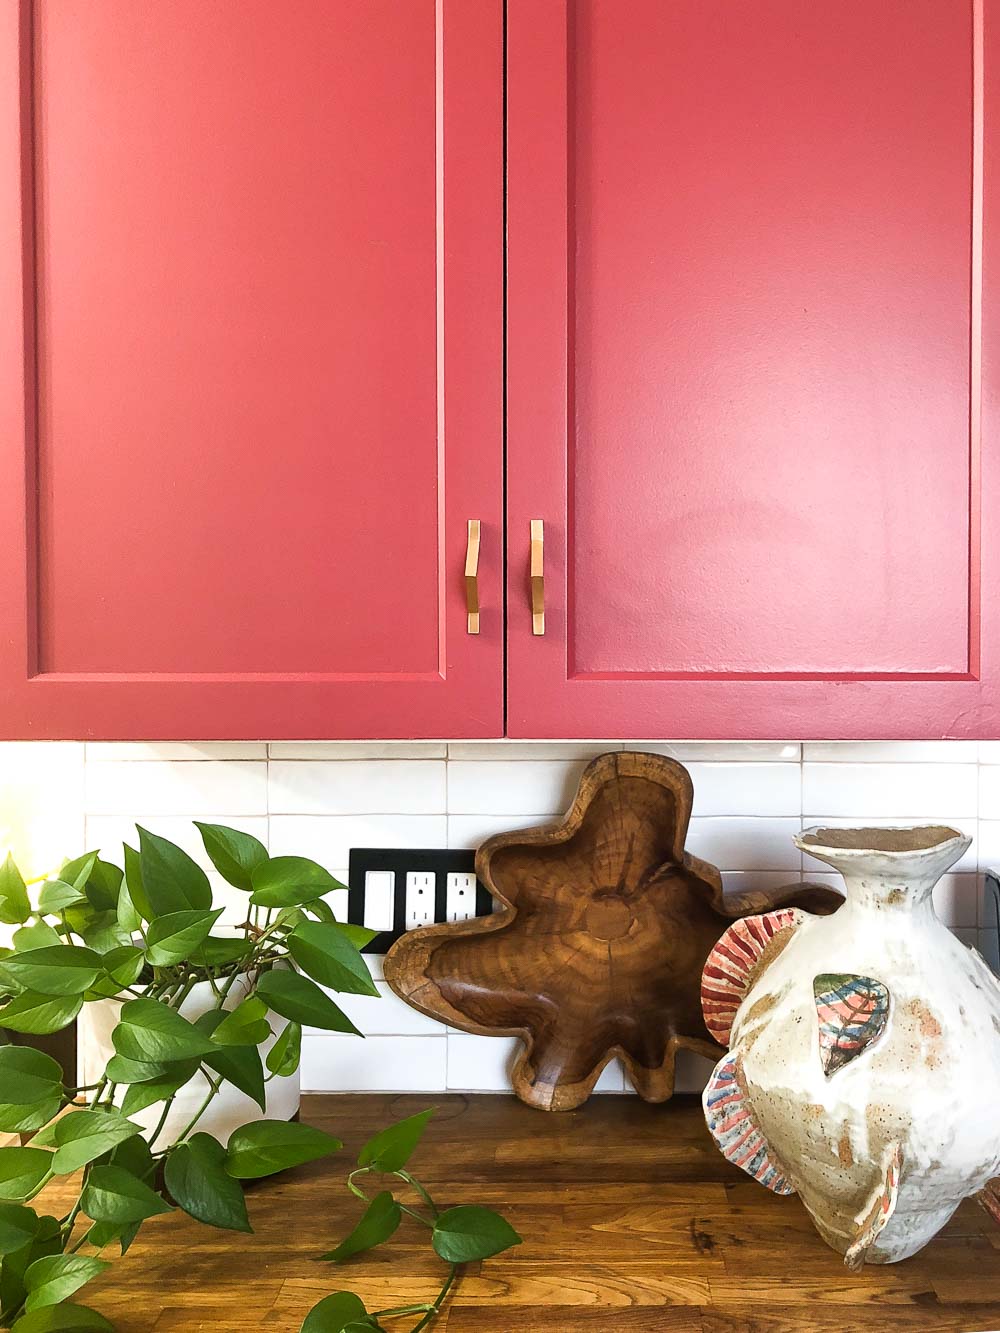
This is how the first drawer front looked like: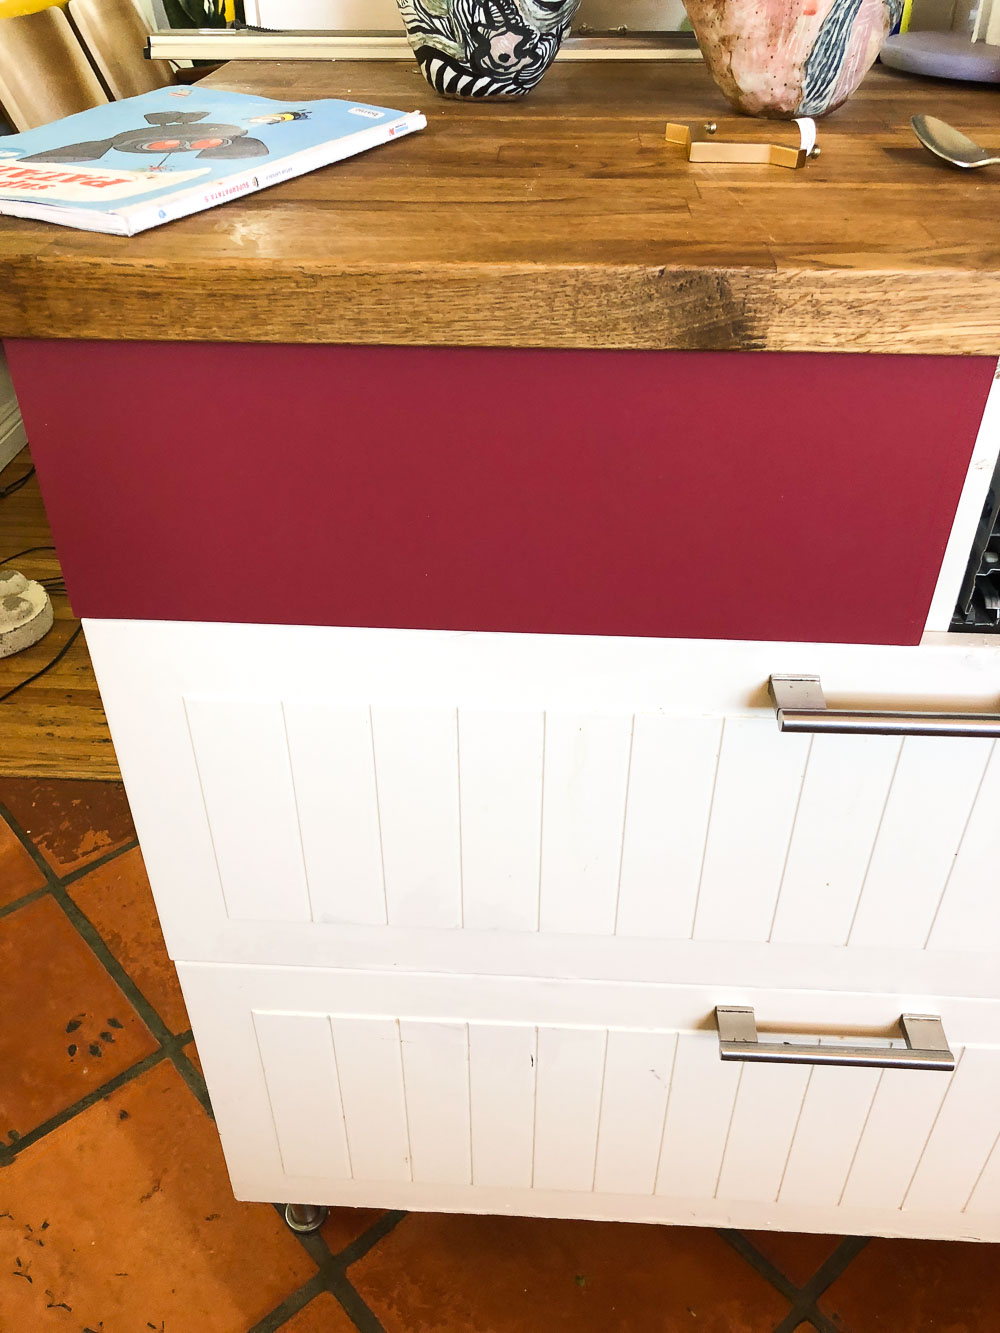 I LOVED IT!!!!! The color stole my heart.
I will show you more photos of this beautiful cabinets once all the handles are on, but, for now, you will have to take my word for it: they look gorgeous, and they make the whole kitchen work!!!! Everything is finally coming together!
In other news, we installed the tiles: I started painting that mural:
 Ceiling medallion and chandelier are up. Sorry for the mess (please, don’t pin this… haha) :
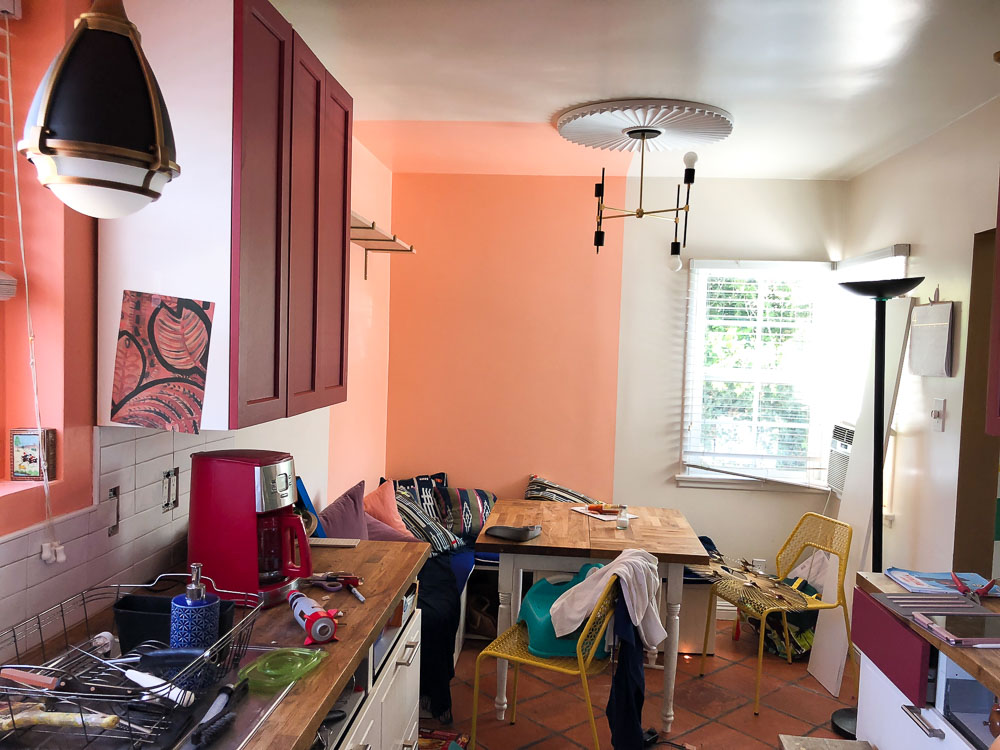 We are waiting for that gorgeous wallpaper from Lucy Tiffney to arrive so we can add it to the side of the cabinets:
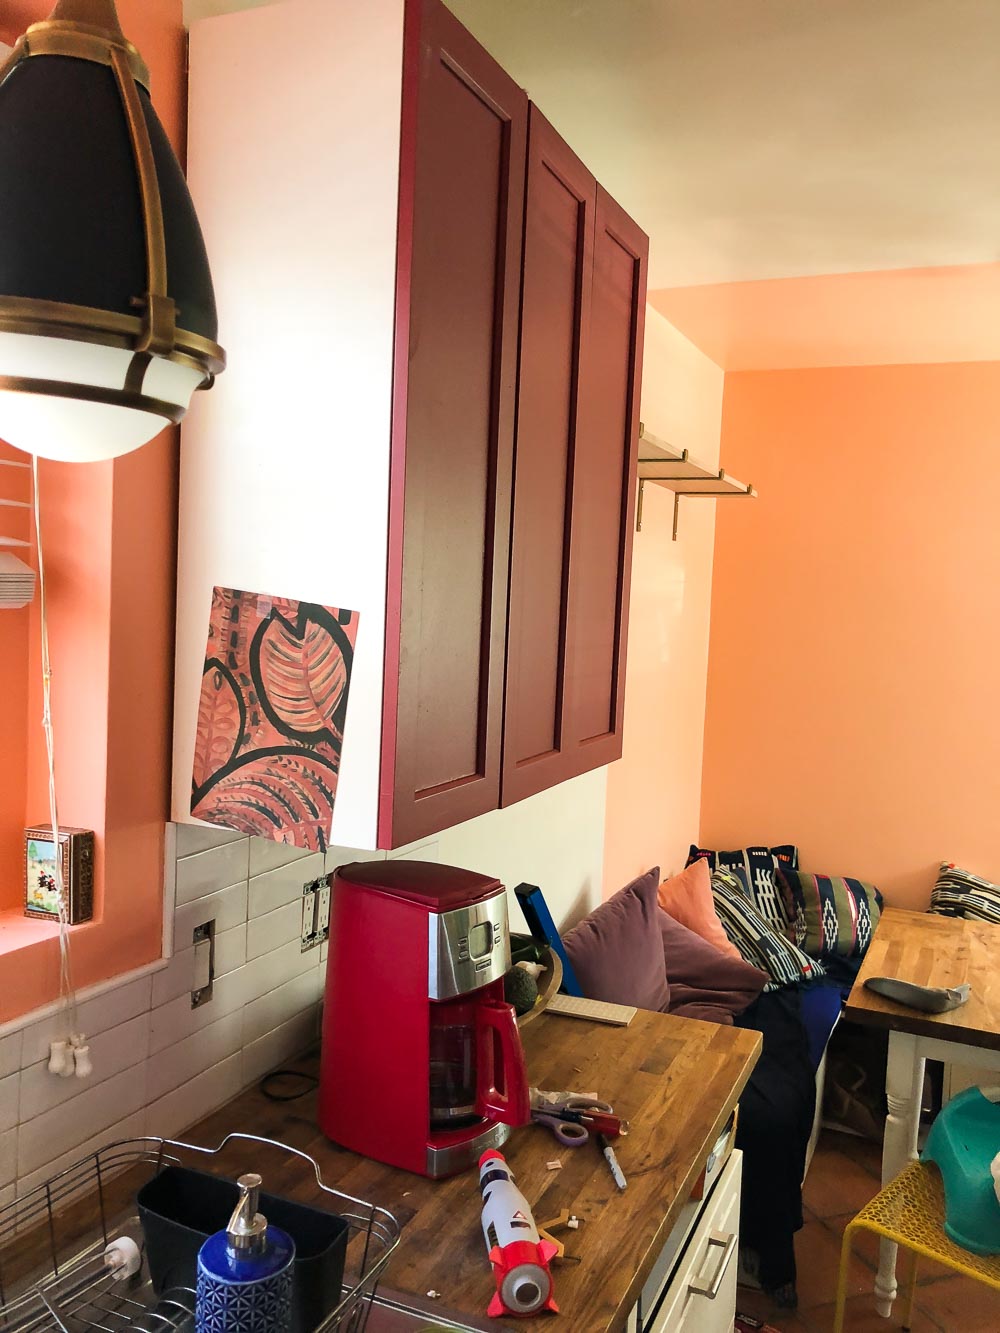 Here are the kids with me at Home Depot. They have been so patience and fun throughout the process. Here is also Max cleaning up messes because he likes playing with water and soap while being “extremely” helpful.
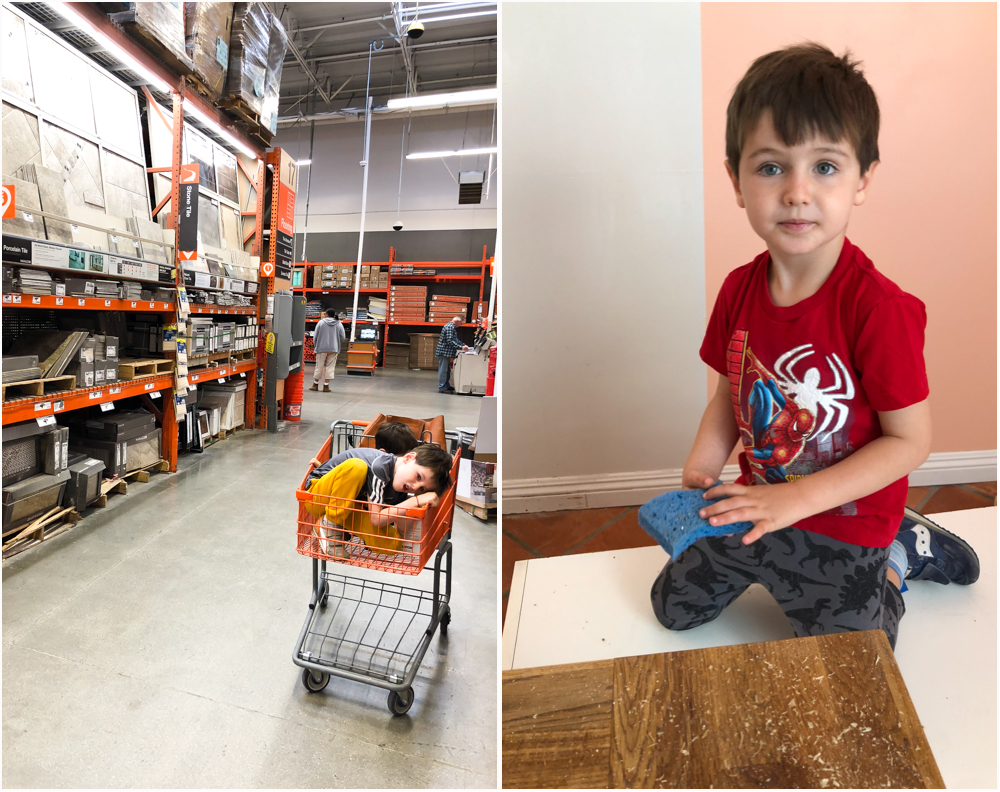
Ok, readers, only two more weeks to go and I am thrilled with how all of is looking so far. I had a minor meltdown last weekend, if you follow me on Instagram, you know everything about it, but now, finally, I feel things are going in the right direction.
Here are the posts from the other weeks:
Week 1 | Week 2 | Week 3 | Week 5 | Week 6
*Thanks to Cabinet Door Mart and Home Right for sponsoring this post, and thanks to you for supporting the brands that make Jest Cafe possible! Have a great week.


Wow, that paint color is amazing! Such a bold choice! I love Cabinet Door Mart doors too. I used them in my own One Room Challenge post this week!
You did??? OH!how fun. I will check out your post right now! I want to see!
That color is so fun! I love the pendant lights above the sink. It’s really coming along!
They are from Lamp Plus. They have the biggest lamp collection you will ever find. Love them.
Ahh! The new color combo looks so beautiful together. AND it is so unique! Can’t wait to see this room finished!
I am very happy with the color combo so far… Hopefully, the mural I am painting will look good in here, too. Thanks!
This is oe of my favorite makeovers this season. LOVE the colors and those pendant lights!!!! Did you share the name of the cabinet color? I’d love to know. TIA… And congrats on so much progress! It’s amazing. ~~ Susie from The Chelsea Project
The cabinet color is radicchio from Farrow and Ball but I decided to match the color in Benjamin Moore paints because it is a lot more affordable… I am so happy that you like the progress so far!!!
You got so much done this week, and i’m rather jealous!!! I’m LOVING that colour on the cabinets! Wish I was brave enogh to do that!
I was scared for a second but I like how it looks now. thanks!
MILA!!! You are such a rock star!!!! The cabinet color and hardware is perfect! Such fresh design. Thanks for the tip on the sprayer and cabinets
A spray is the only way to paint cabinets, in my opinion. It is a lot faster and looks better, too.
What a FABulous color!!! I love my HomeRight sprayer, my hubby and I painted 10 interior doors in a day using ours. I can’t wait to see all the cabinets!!
Exactly!!!! There is no comparison!!!! A spray is the way to go.
Great color choice. Very bold and fresh!
The wall next to it is coral and I like the color combination. Thanks!
What a stunning color for kitchen cabinets!
So happy you like it!!!!
I love the paint colour you picked! I have to paint some of our new cabinet doors this weekend – I’ve done it before and I am not looking forward to doing it again! I’m too impatient for drying times lol – I can’t wait to see that mural!
I would DEFINITELY recommend a sprayer. It will make your life so much easier.
AH! Esta super y que choro! todo se ve ya listo!
Esa foto es MUY mentirosa!!! ja. Esa esquina es la única lista… pero ya falta poco. Gracias!
Such a cool idea to use this vibrant cabinet color! Looks awesome! Our four-year-old has been really into “helping” too…a double-edged sword at this age. 🙂
A total double-edged sword… haha… because it is dangerous from every single point of view… hehehe
HERMOSO!! Quiero verlo en vivo y directo
Vente!!!!
I love that you went bold with the radicchio paint color on the cabinets – they look great. You’ve also convinced me that I need a paint sprayer in my life. Hang in there, it’s looking great!
A paint sprayer is the way to GO!!!!!!! I a telling you. I am never going back.
Oh such a pretty color for the cabinets!!! Can’t wait to see more of this colorful space, that wallpaper is so fun!
I am starting to get worried about how the wallpaper AND the mural will look next to each other… it might be too much even for me
I’ve been dying to see what color choices you went with! This colorful space is going to be so rad. I cannot wait to check back next week and see where you are at.
Danielle
clarkandaldine.com
Thanks! I am starting to doubt the need for wallpaper AND a mural.. it might be too much… we will see.
Now that I have seen the interesting color choices, love the red and the other melon hue, I can’t wait to see it all come together. Kind of making me want to paint my 1 green wall.
I would love to see that green wall!
Bold choice and perfect for the coffee pot 😉 It’s a beautiful color! It’s hard to pick reds and blues, imo. Reds can look too candy cane and blues too royal blue. But this red is lovely.
haha! that is funny you noticed the coffee pot! I will have to make it disappear for reveal shots… hehe
Oh my goodness! You guys got A LOT done! I can totally relate to the Ikea cabinets (we had the exact ones). We painted ours last year as a stopgap, but plan to replace them soon. In fact, I did away with most of the uppers already! Your kitchen is going to have so much color and personality I cannot wait to week 6!!
We got a lot done last week but this week I am so LAZY! I don’t know how to get out of it. Oh well. Thanks!
You’ve DONE so much and I’m stressing over a gallery wall, LOL. I love the color you chose and think it’s so you.