
Outdoor Painting – The Reveal
First of all, I want to say I am sorry. I promised I was going to do an outdoor painting months ago and I never delivered. What is worst is that I have a lot of views on that false promise post and I am sure some of you are wondering why I am such a flake!
Well, I was supposed to finish this outdoor painting months ago but then the weather decided it was time to put an end to the draught in CA and ruined ALL MY PLANS! Buah!!!!
Yes, my friends, it has rained in LA every week since the beginning of January so I was only able to finish this project last week. I have been trying to find ways to improve my garden and outdoor room and I came up with this idea some time ago.
Here is the post that details my plans and inspiration. I wrote it back in January and promised I would have it ready in two weeks. HA! Well, I FAILED! I am a failure and a liar, but like most people who fail, I say: better late than never. Ha. I am SO funny today.
The truth is that, even without the rain, the project would have taken much longer than anticipated. Although it doesn’t require a lot of technicality, it does need patience and time to create straight lines and perfect triangles. You need to make sure everything is perfectly dry before moving on to a different section of the painting, so yes, I failed in my timing but not in the final execution because it got done and it looks quite good.
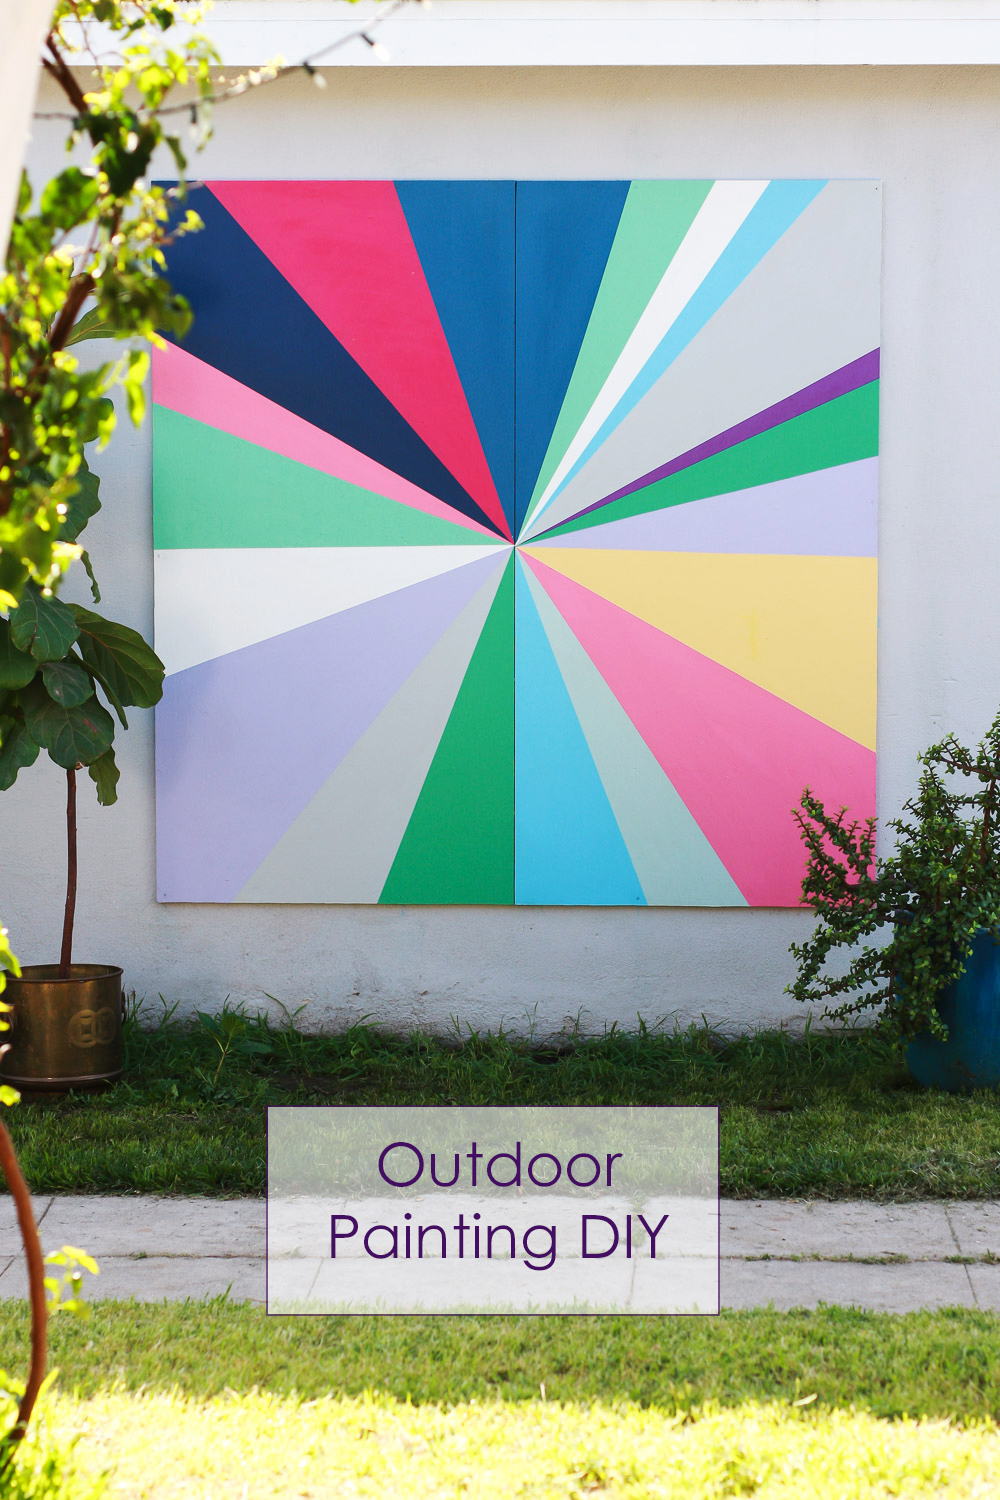
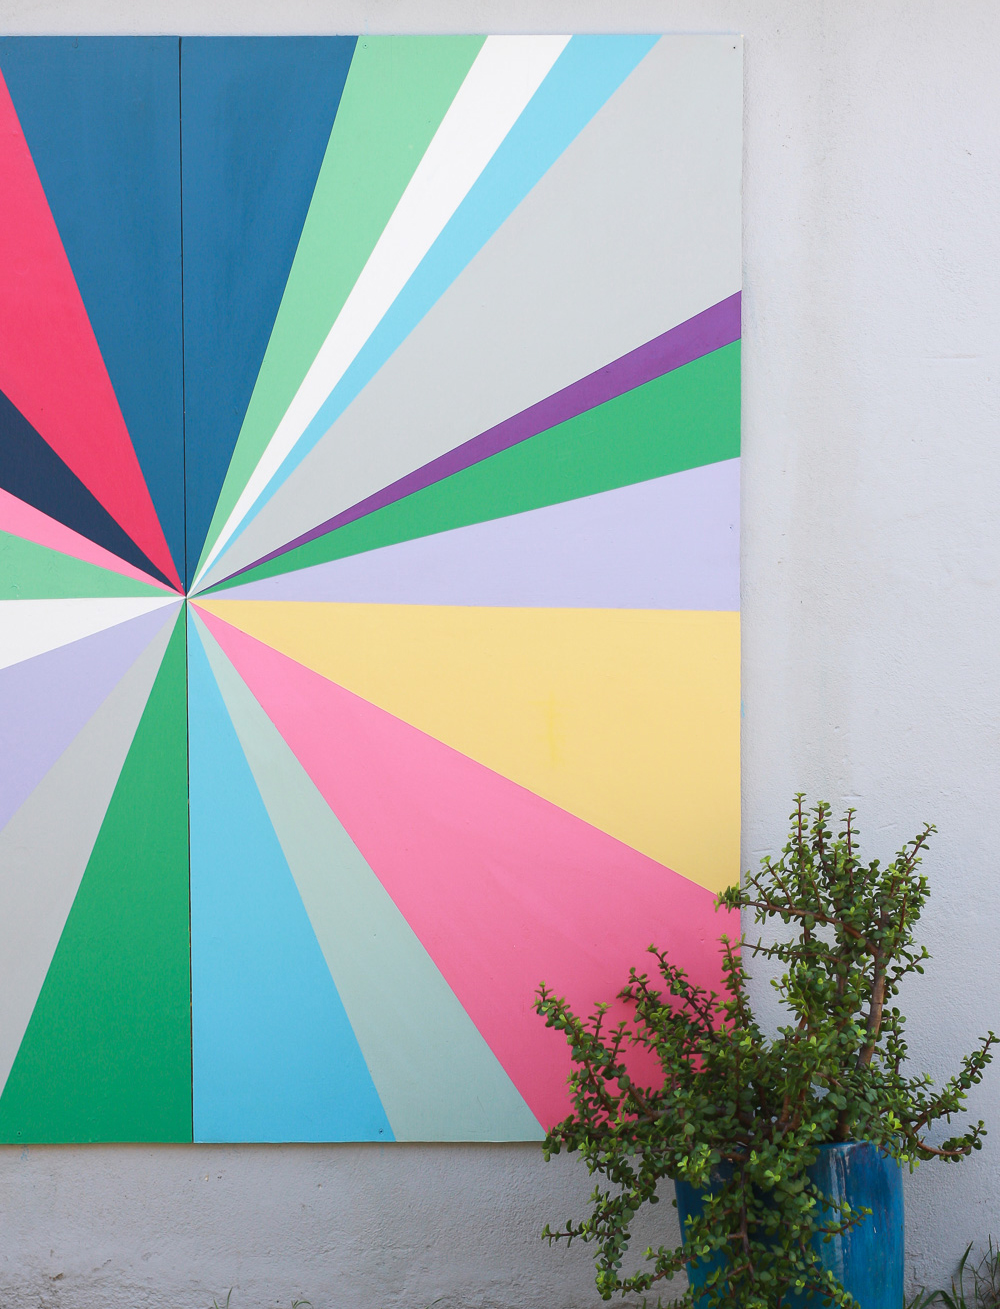
The garage wall went from blah to Baboom!!!!! Which was the only intention behind this project. Also, I wanted to have it done in time for our Easter Hunt, so that worked out. Pat on the back. Pat on the back.
 Here is what you will need for this project:
Outdoor Painting
Difficulty (1-5): 4 Time: 1 week Cost: $70
Materials:
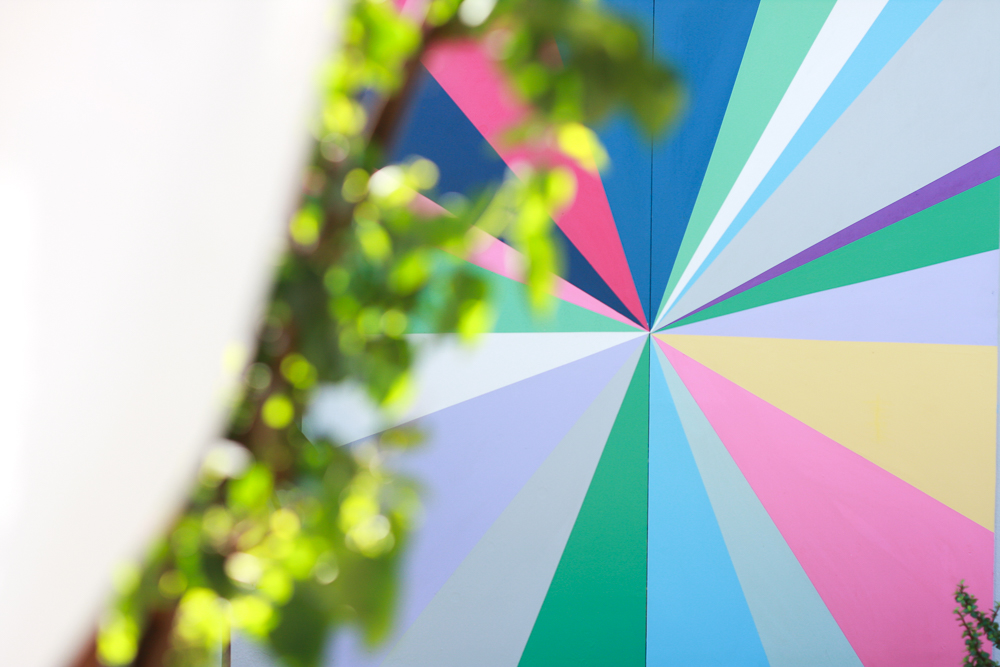
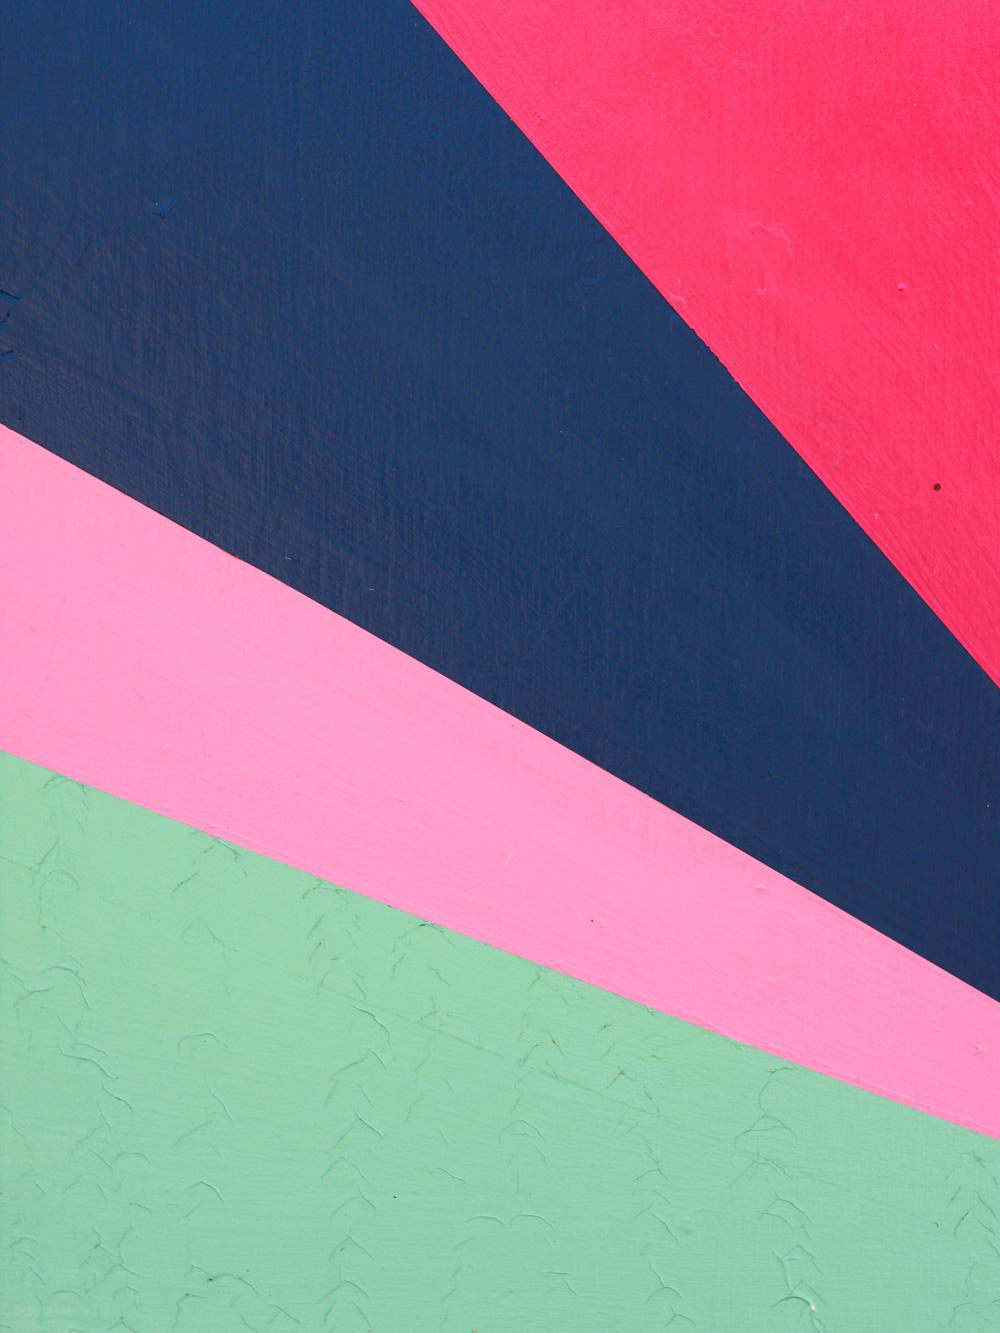
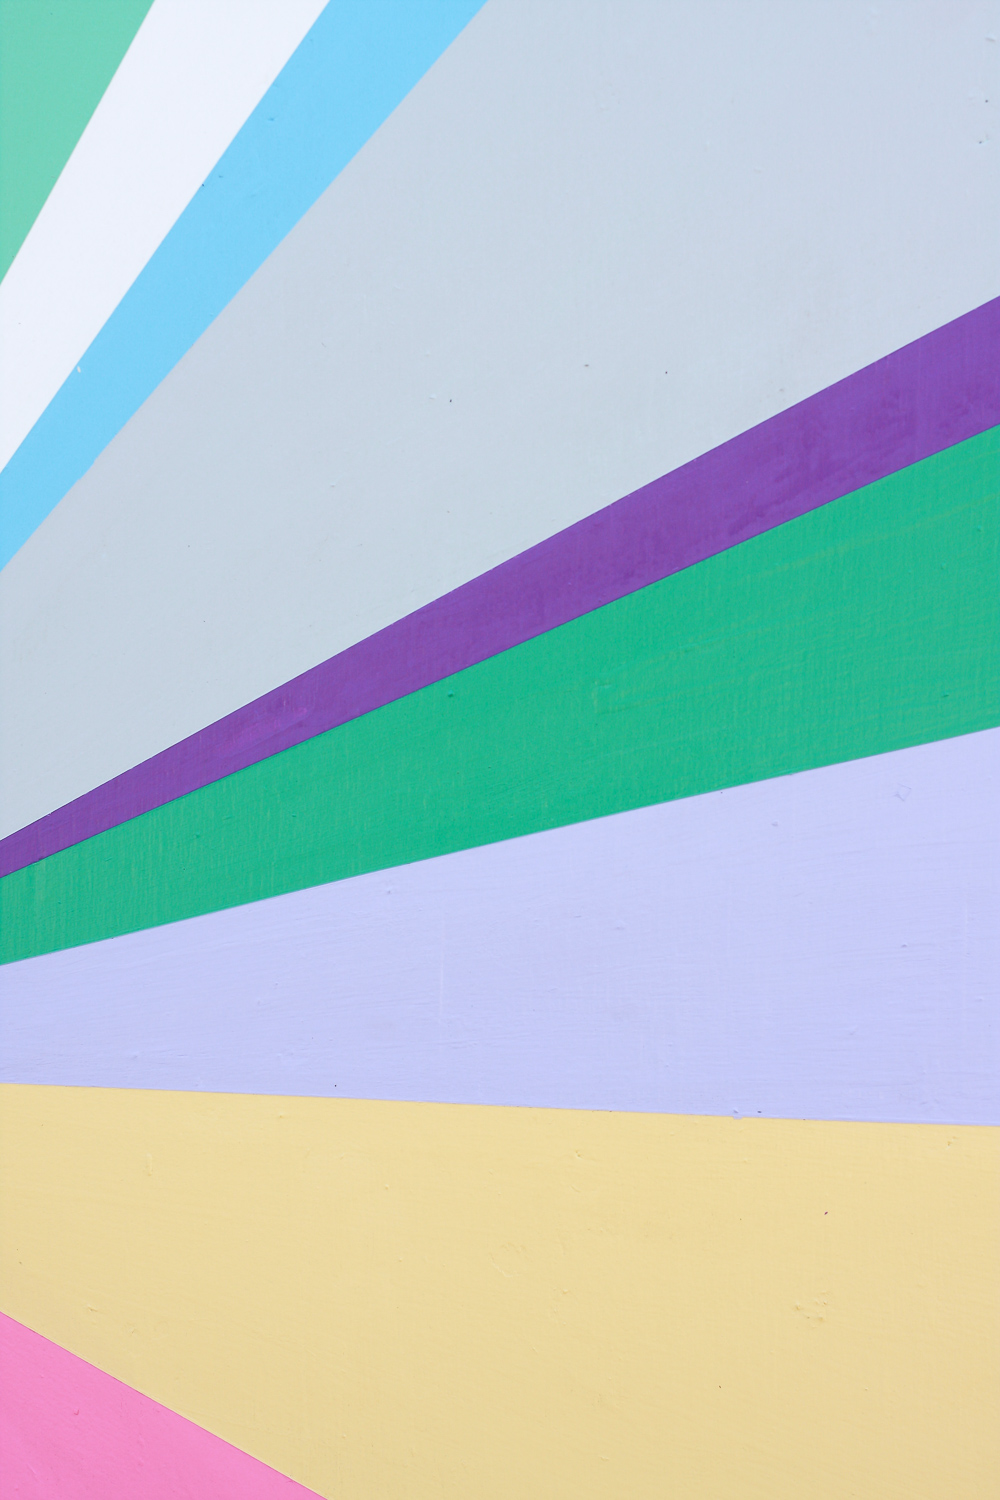
- Lots of latex paint colors for walls. I used 13 sample sizes of flat color, mostly from Behr.
- 8ft x 3ft sheet of plywood
- Pencil
- Blue tape
- Small and big brushes
- Measuring Tape
To hang the painting:
- Stud finder
- Drill
- Level
- 2 1/2″ screws (to hang the painting outside)
Instructions:
1) Cut your Plywood to whatever size you want. Mine is a square shape of 6ft x 6ft.
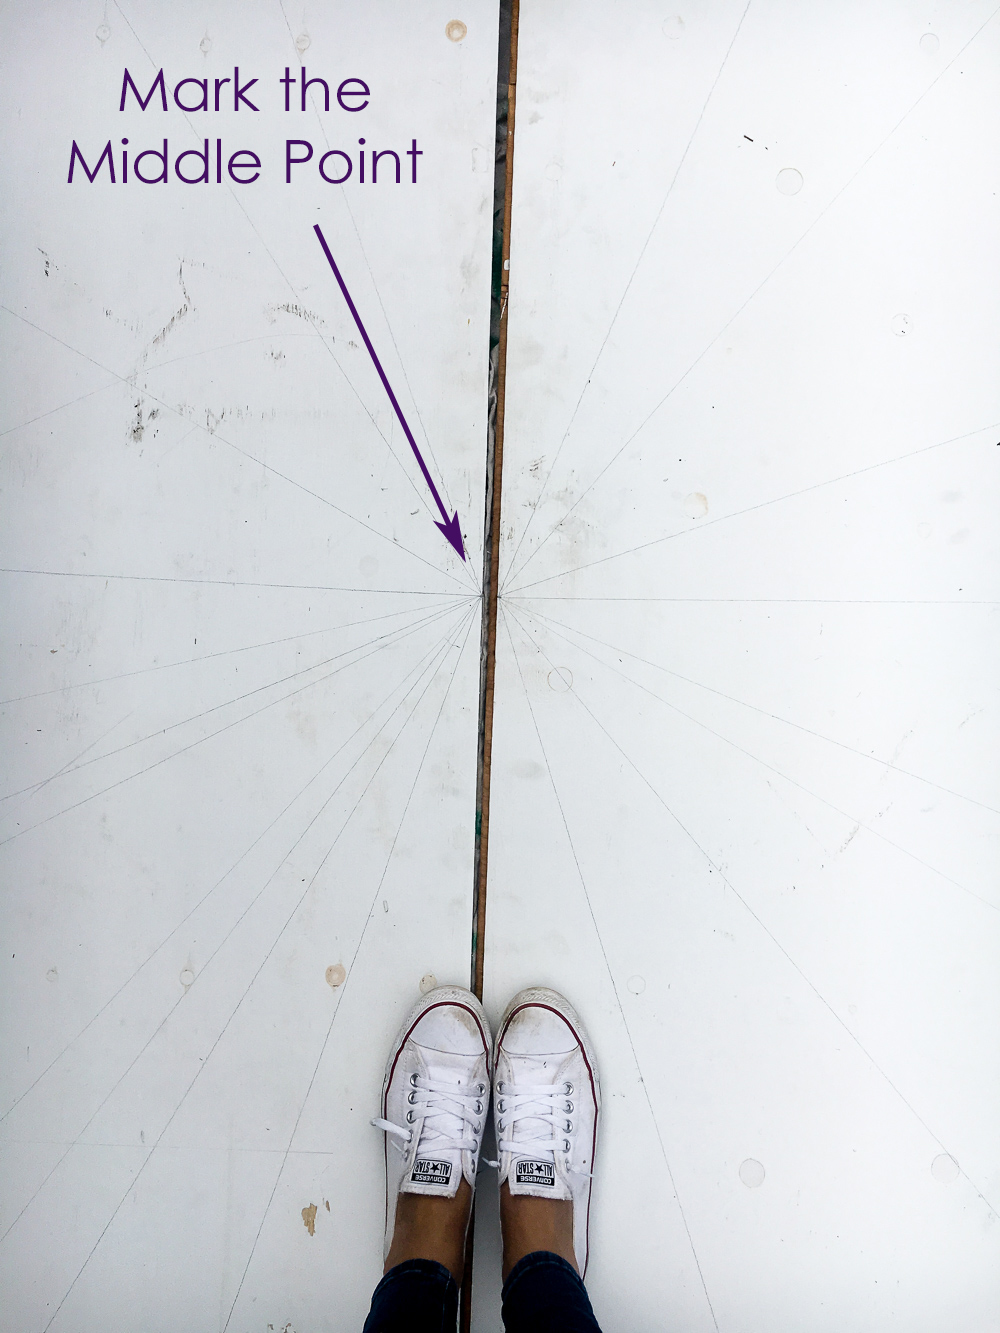
2) Mark your middle point – the place where all triangles meet.
3) Draw the straight lines from the middle point to wherever you want the sides of your triangles to go.
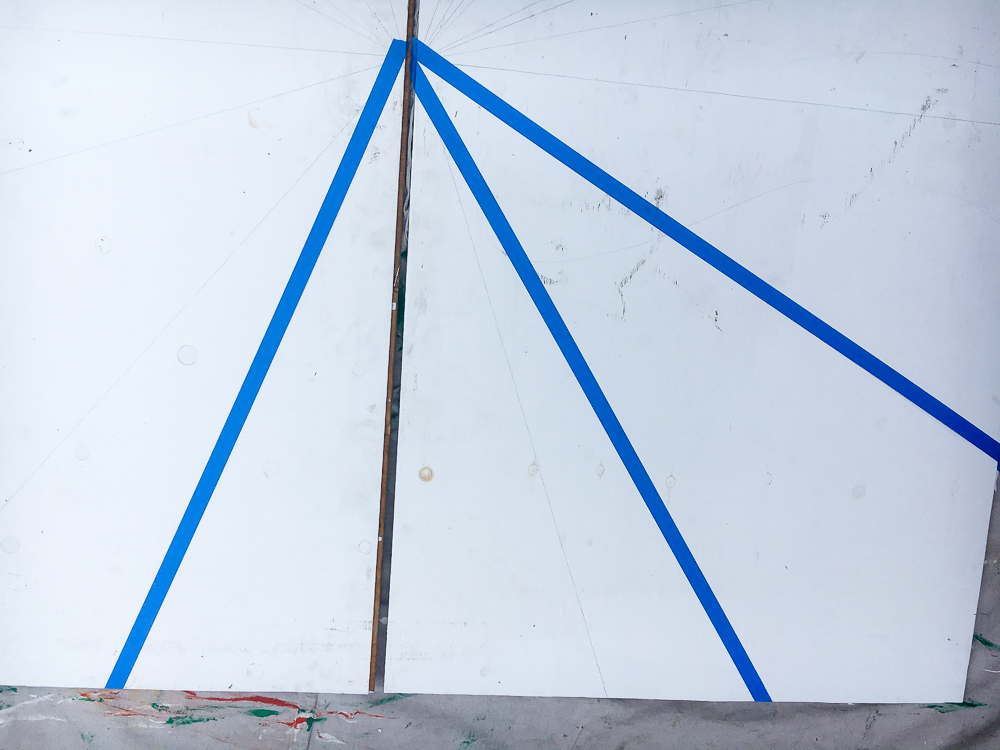
4) Align a strip of blue tape to the lines of the first triangle you want to paint. Make sure you press it down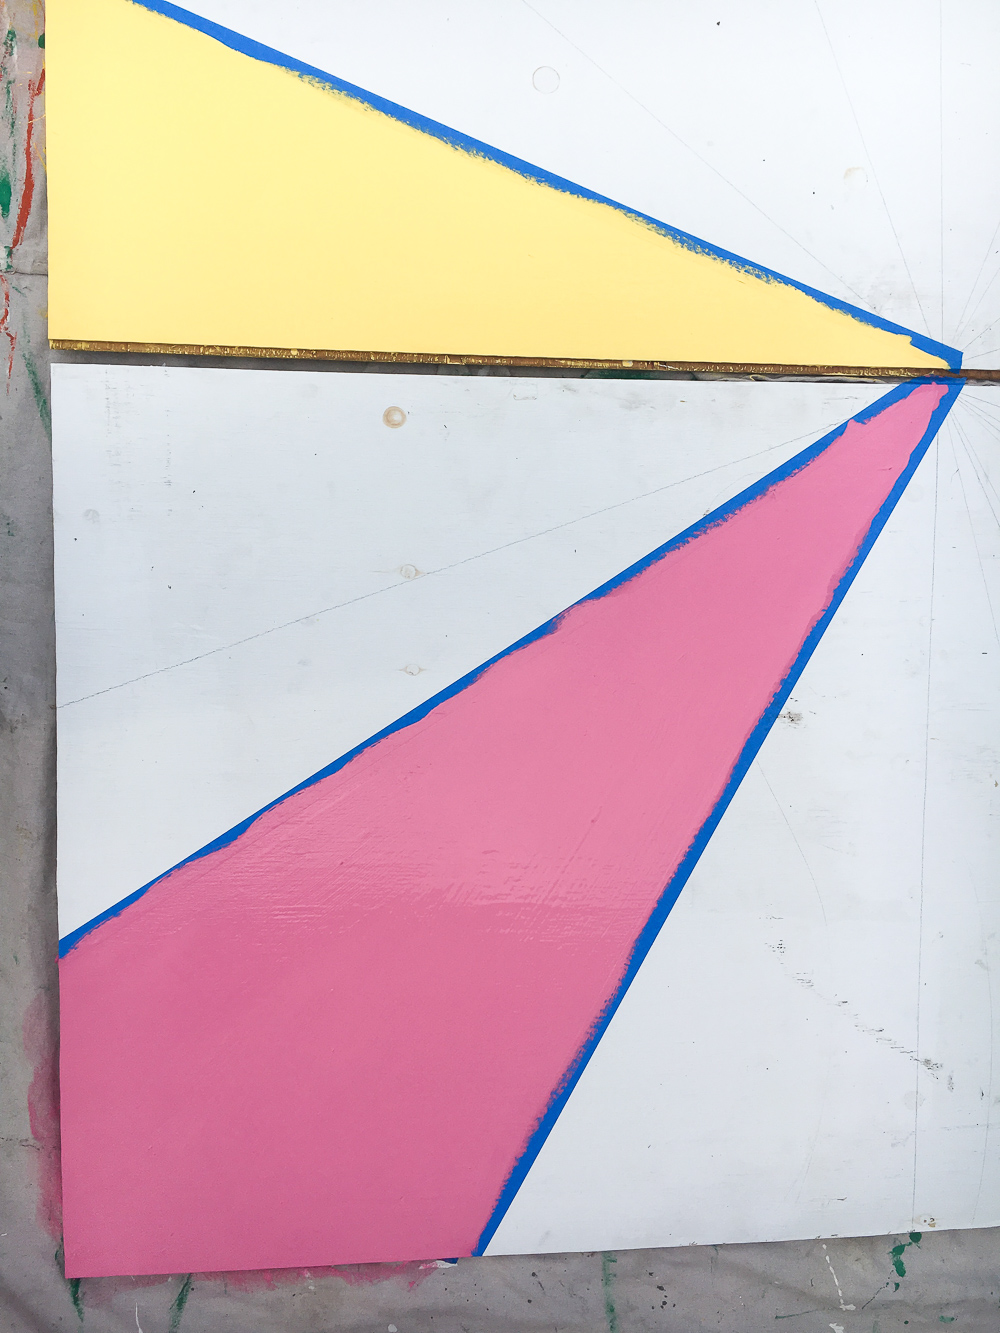 5) Paint the triangle and wait until paint is dry. Touch the paint to make sure is not tacky.
6) Do the same for the triangle that is not right next to the one you just painted. So, for the first pass, paint every other triangle of your painting.
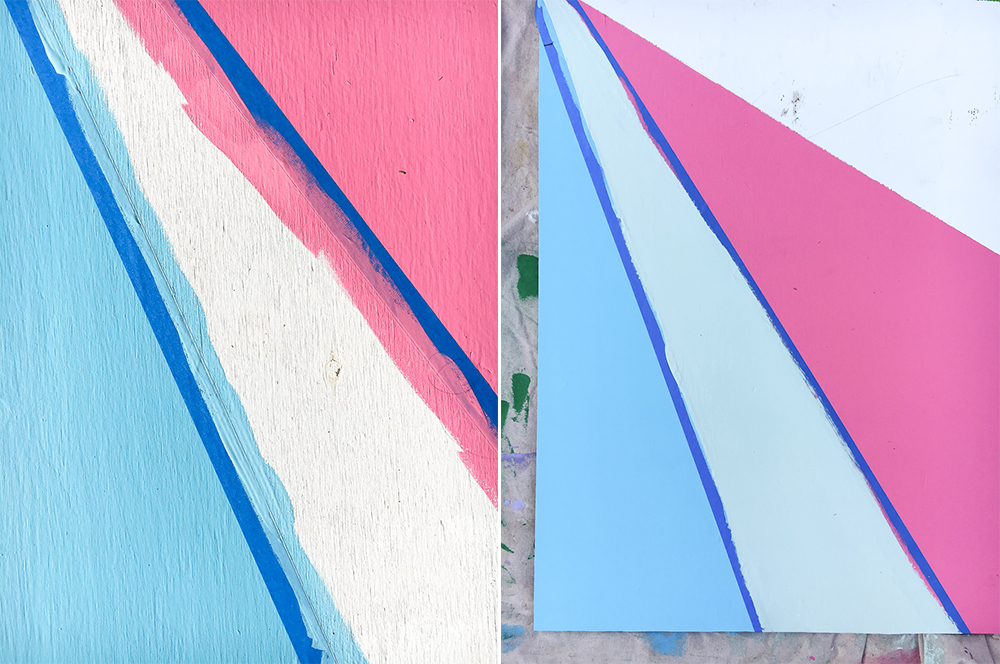
7) Now it is time to paint the triangles that were left without paint and getting a straight line is vital! To do this, place the blue tapes on both sides of the triangle you want to paint. Make sure the paint is completely dry.
8) Paint on each side of the blue tape with whatever paint is below the tape, meaning the color of the triangle right next to the one you are trying to paint.
9) Wait until it dries and paint the whole triangle with the final color. Now wait until the painting is completely dry. Sometimes this will take hours.
10) Strip out the blue tape
11) Drill through the painting into the wall to hang it. Find the studs to do this.
12) Fix details with your small brush, for example, fix lines that are not straight, paint over screws, paint over any imperfections.
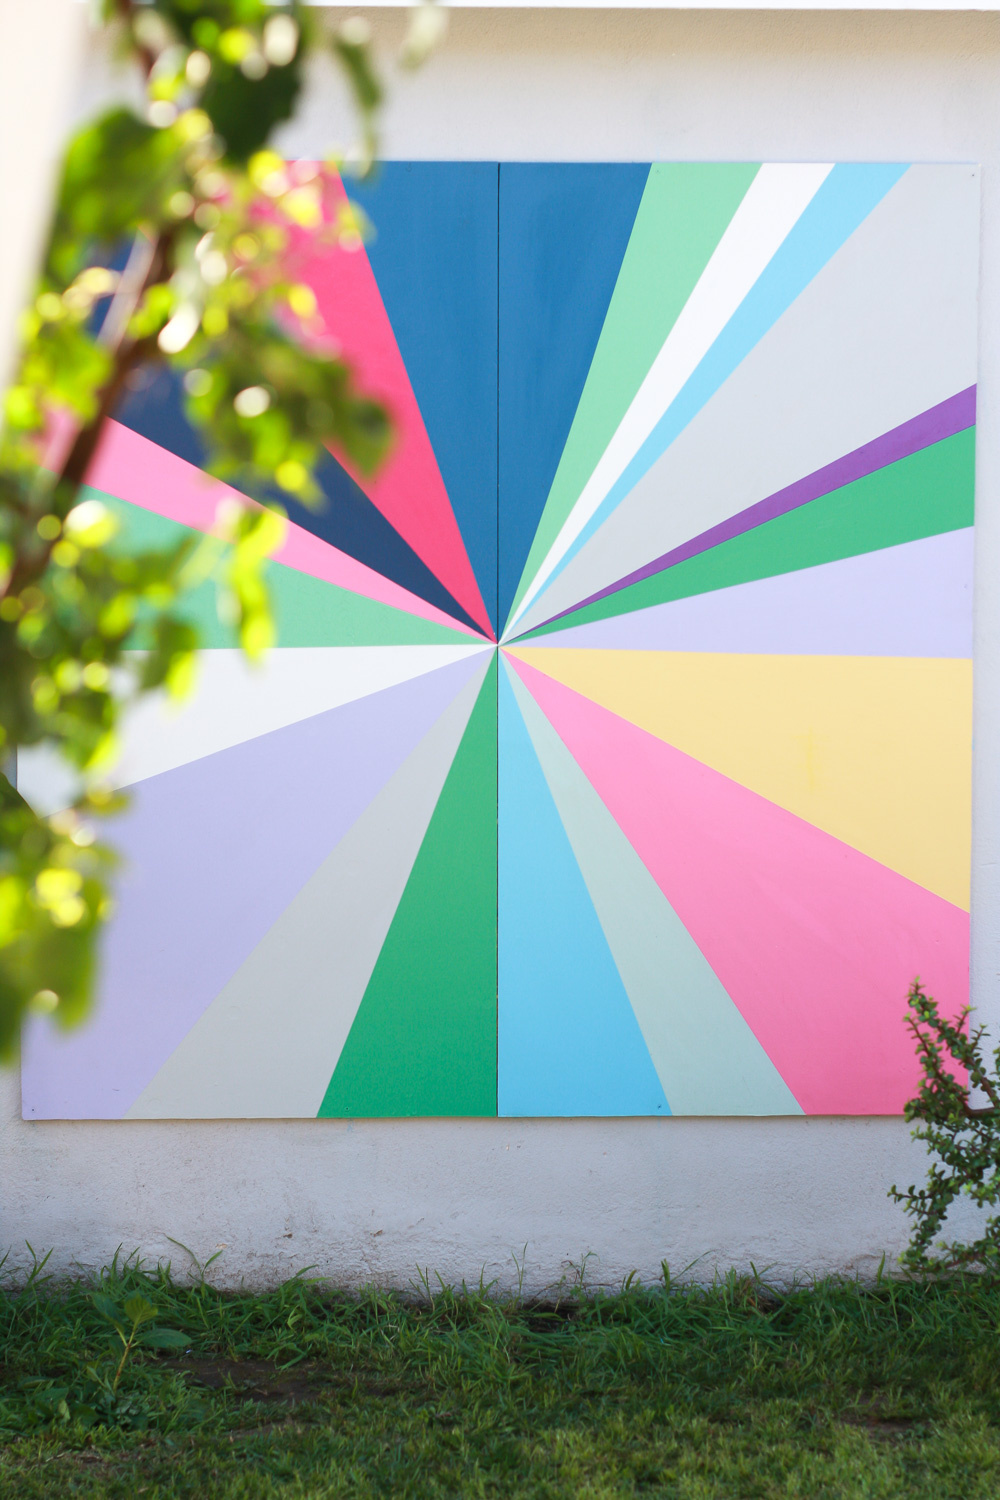
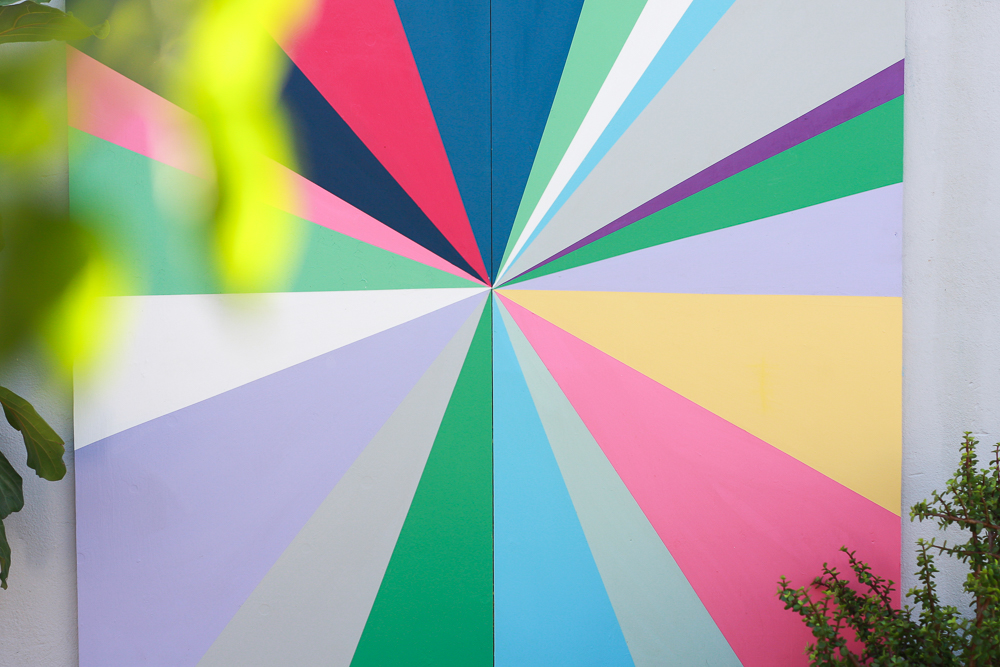

So, what do you think? I like it. It has the soul of Spring!
In case you want to make a painting for the inside of your home, here is a tutorial about how to make a mural.


Hermoso!! Que pared es esa??
La del garage. Quedó linda! Las fotos no le hacen justicia!
Love it Mila! It looks amazing!
Thanks, Emy! I really appreciate it!
So pretty!
Thanks, Carina! You are a lot more talented than I am but I appreciate the love!
Thanks, Mila, but I think you are amazingly talented!!
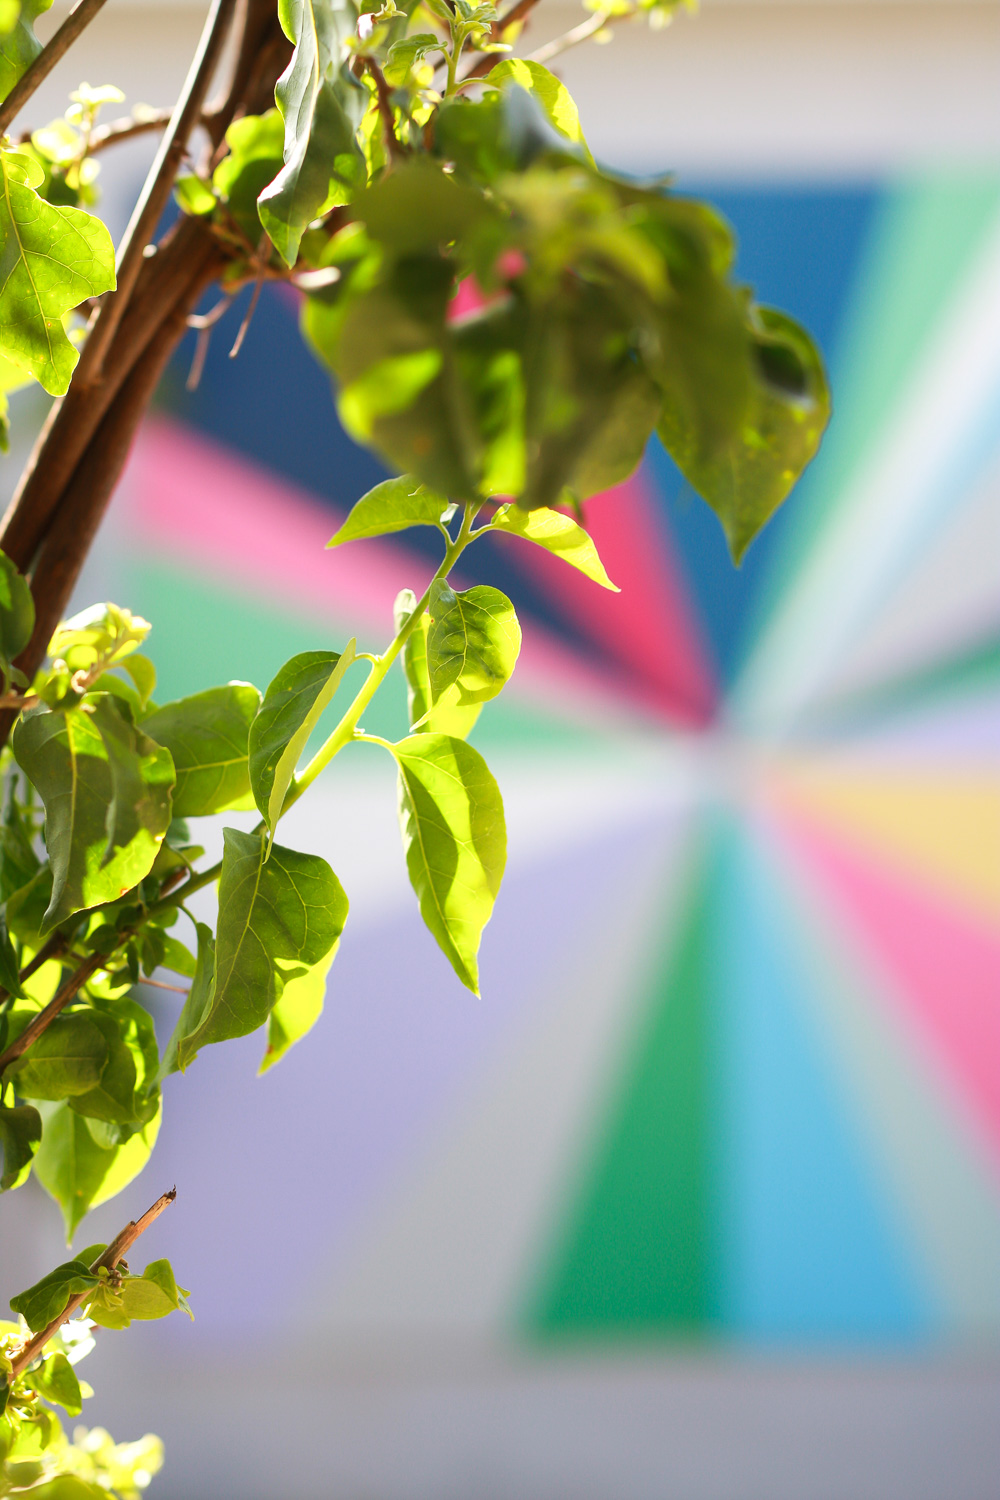
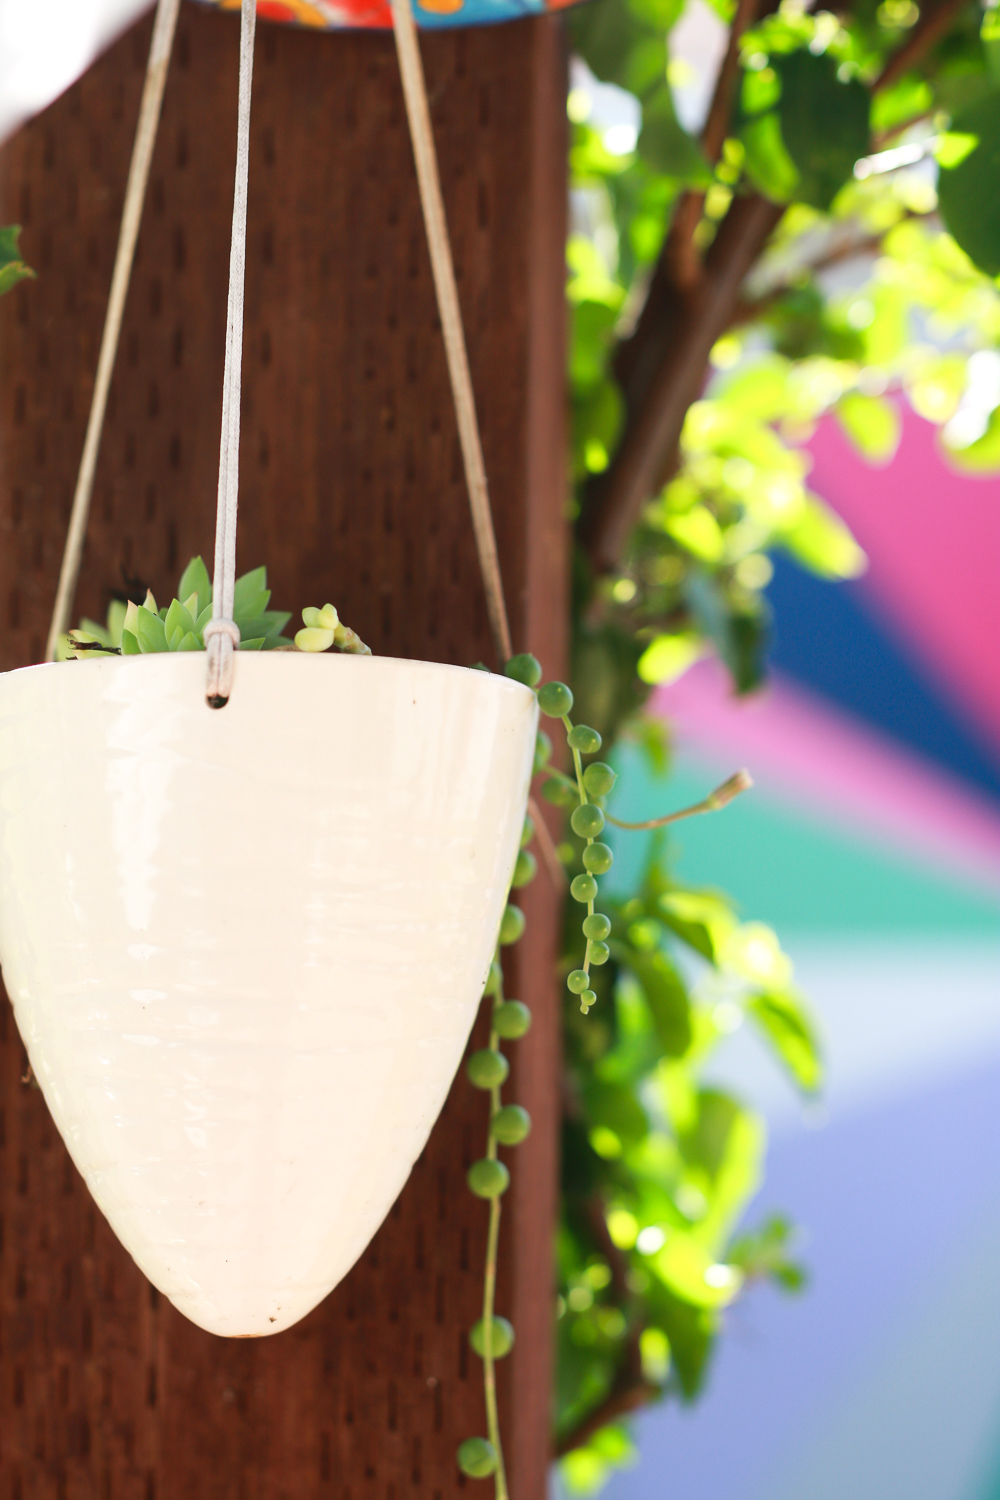
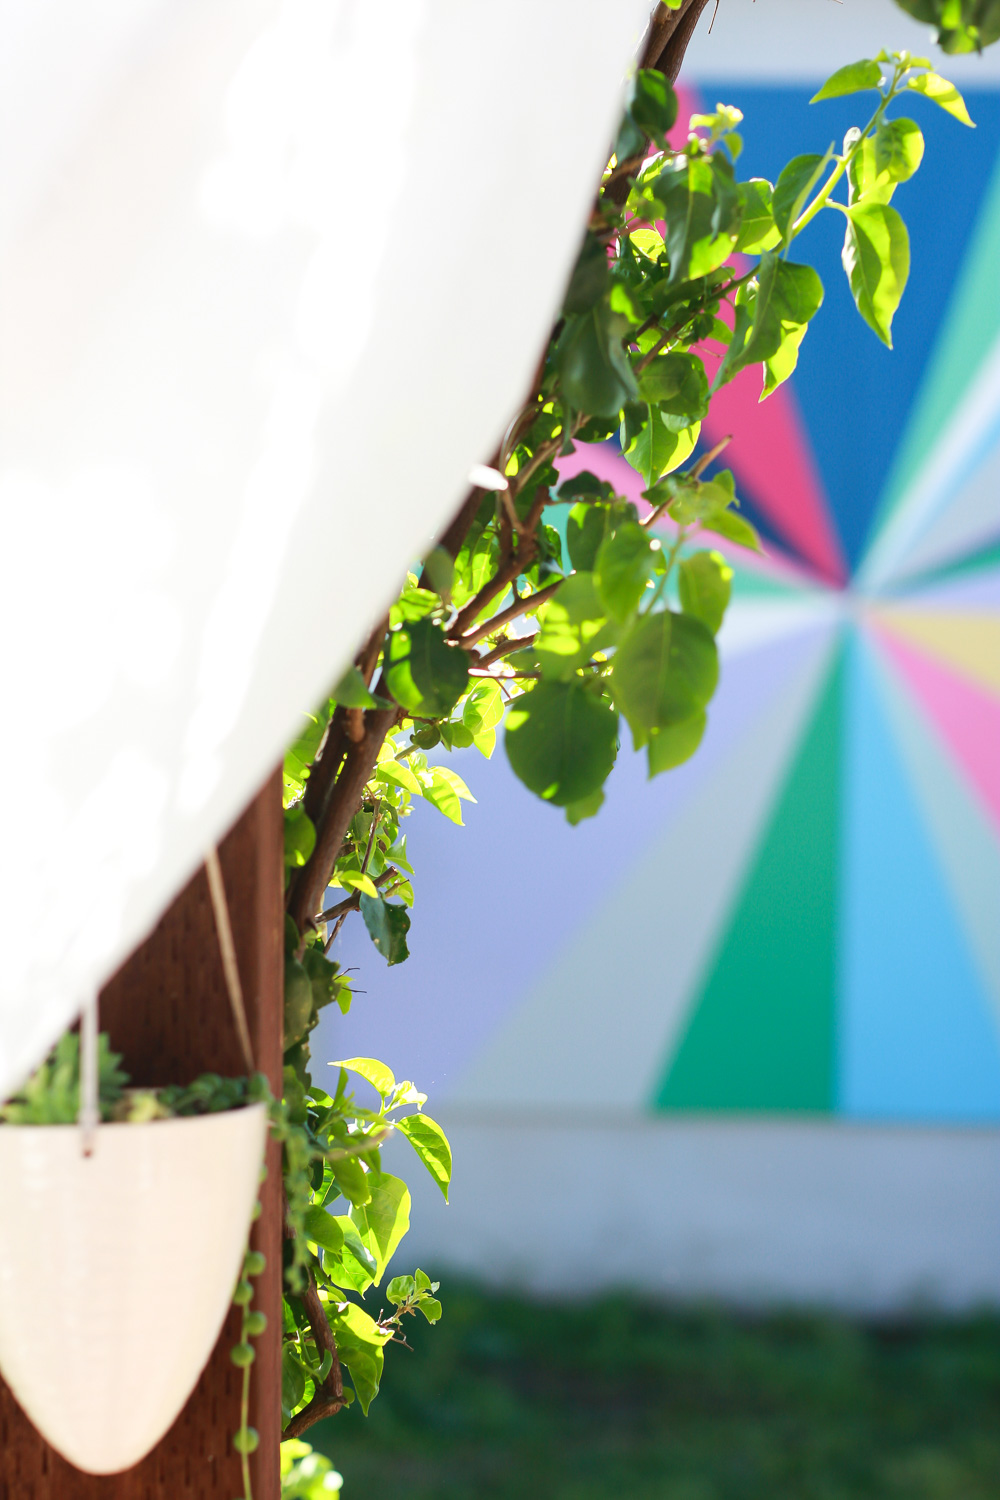
Looks great Mila! Such clean lines and I do love the colours you chose. Those close up of the leaves with all the colour in the background = <3. How much of the side of the garage does it cover? A third? It looks so much bigger than I expected you to make it and gotta say I prefer it this way.
Certainly a project worth waiting to do!
Elise! I am so happy to “catch up.” How are you? You were spot on about how much the painting covers the garage wall… exactly 1/3. How is Thomas? I feel like we need to catch up via email. Hope you are doing great!
Yup! Doing great, especially now that we’re getting some amazing weather! 🙂 Would love to catch up by email! Send me one to the email address I use to comment.
1/3 is perfect I think. Like I said, it’s much bigger than I expected, and I love that!
Yes, I have your email in my address book, too!
This installation is so pretty and has California vibe written all over it!
It does… and Spring, too. thanks!
Looks great! Is there a reason why you didn’t use exterior paint?
The sample sizes came only in interior painting types. I didn’t want to spend the money for a full quart in each color, so I got the samples. Also, I live in LA and the weather is mild, which means the painting should be fine for a while. Still, knowing me, i will probably want to do something different on this wall in a year or two, so I don’t need this painting to last for a long time. I should give you an update about how the painting is doing in a year from now. Best!
Came out great! Thanks for the mention.
I am happy you like it! Your painting is just amazing. So vibrant and happy.
Love it! Did you do anything to protect it from the elements? Maybe not such an issue in California?
Nothing. I could have painted it with exterior paint, but it is a lot more expensive. Something to consider if you live in colder climates!